 小径
小径小径 · Illustrated guide
From one goal to everyday action.
Follow a press-to-handstand goal from creation through daily work and reflection.
Current Android emulator captures · Demo data · Select an image to view the original
01 · Give your goal a clear starting point
We will use “Learn a press to handstand” as our example. Describe the outcome first, then decide whether to plan manually or with AI. Exercises and dates illustrate the app; they are not a training prescription or a promise to learn in 14 days.
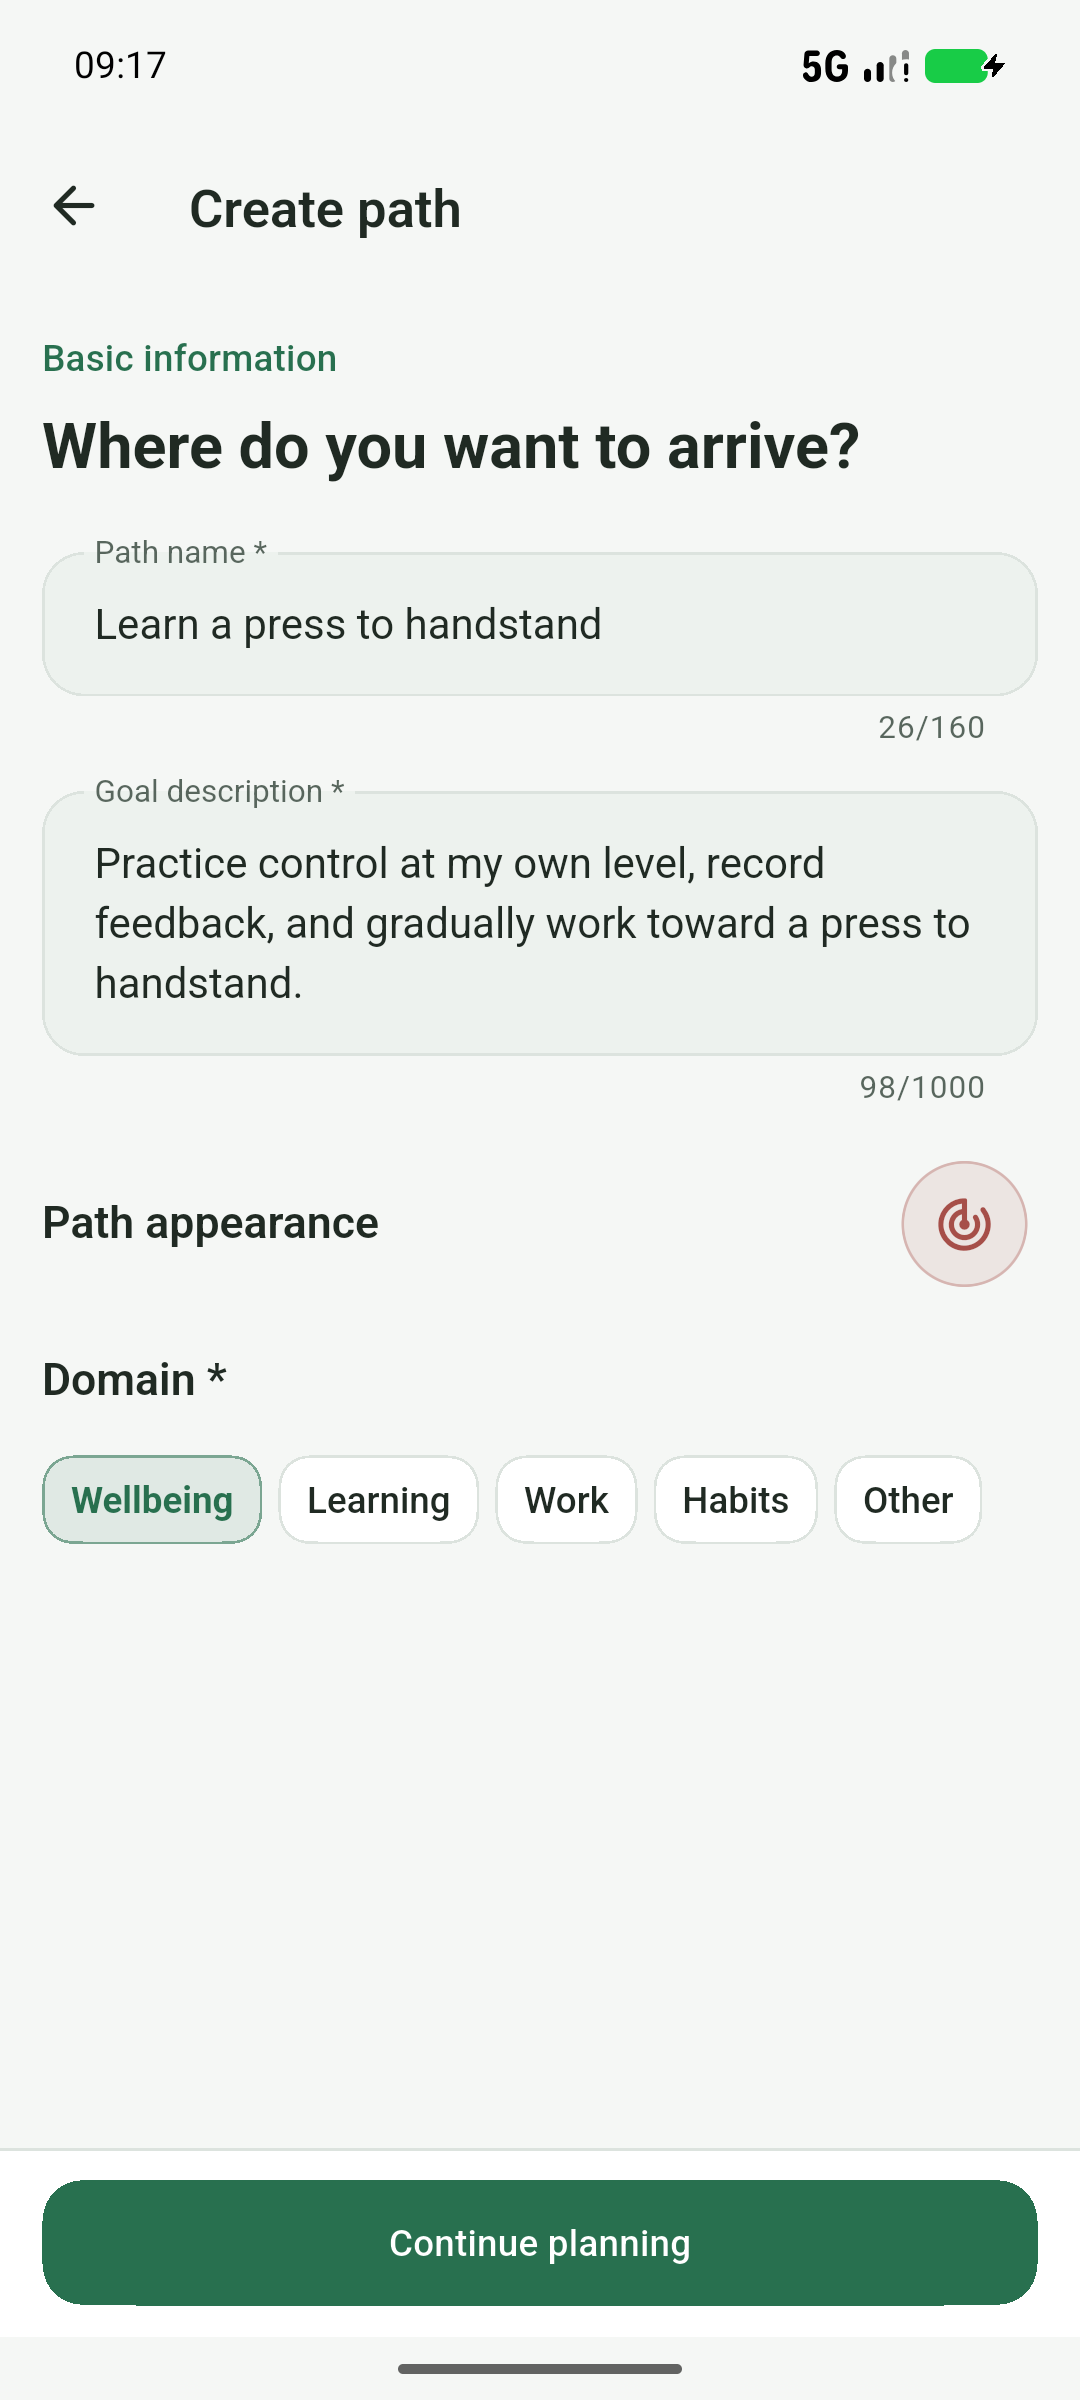
- From Today, select + → Create path. Name your goal, then describe the outcome and your starting point.
- Choose the Wellbeing domain for this example. The name allows up to 160 characters and the description up to 1,000. Choose an icon and color if you like.
- Continue and choose a creation method. We walk through manual planning first. With AI configured, you can choose the in-app assistant instead.
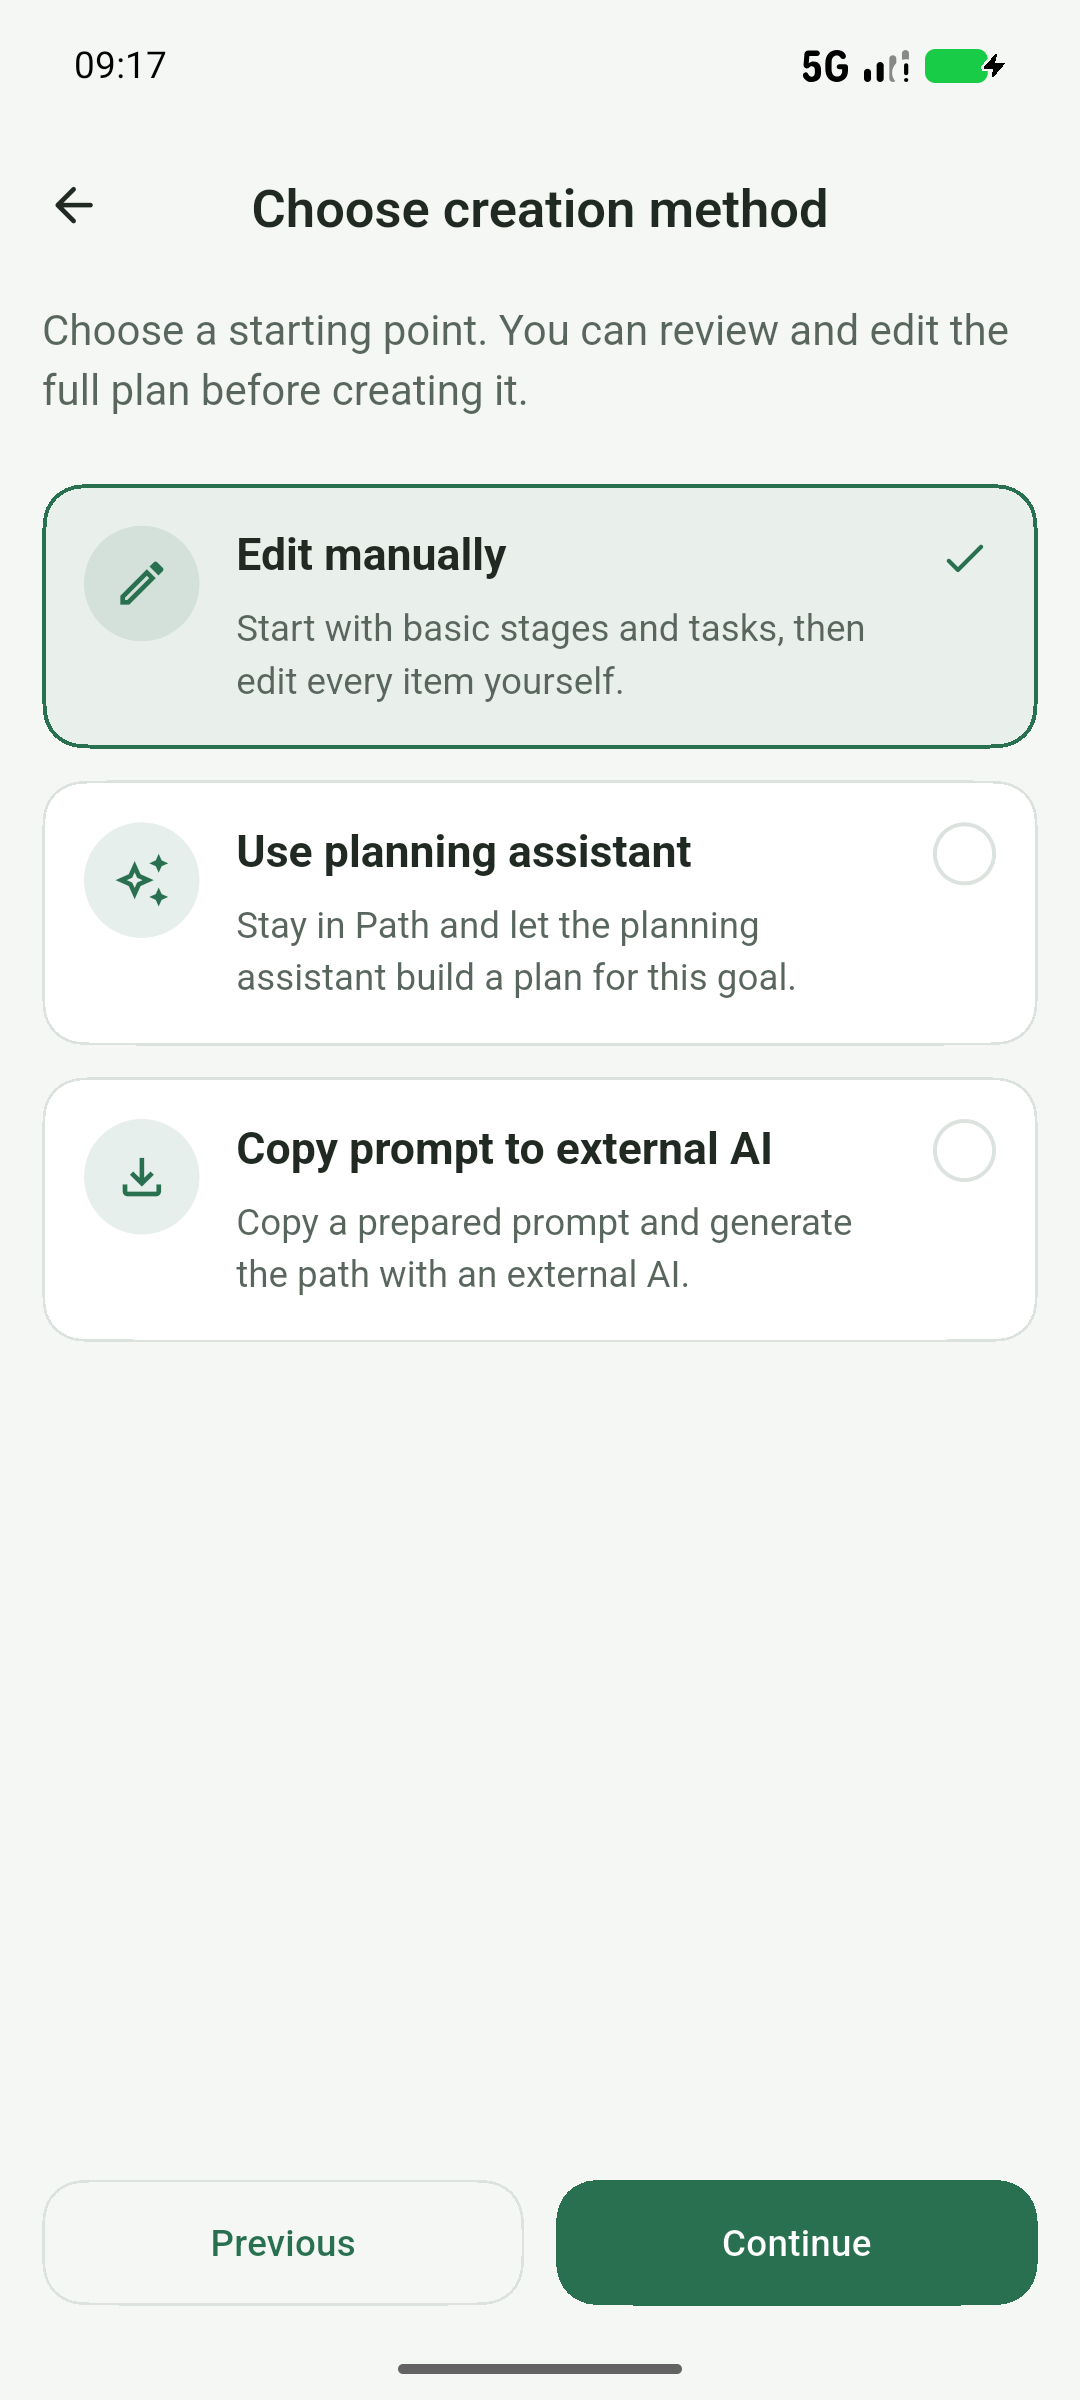
Which creation method should I choose?
Plan manually when you know what you want. The in-app assistant uses your answers to propose an editable plan. External AI / import lets you use a prompt in another tool or import compatible path JSON. Every method ends with a review and confirmation in 小径.
02 · Turn the plan into doable work
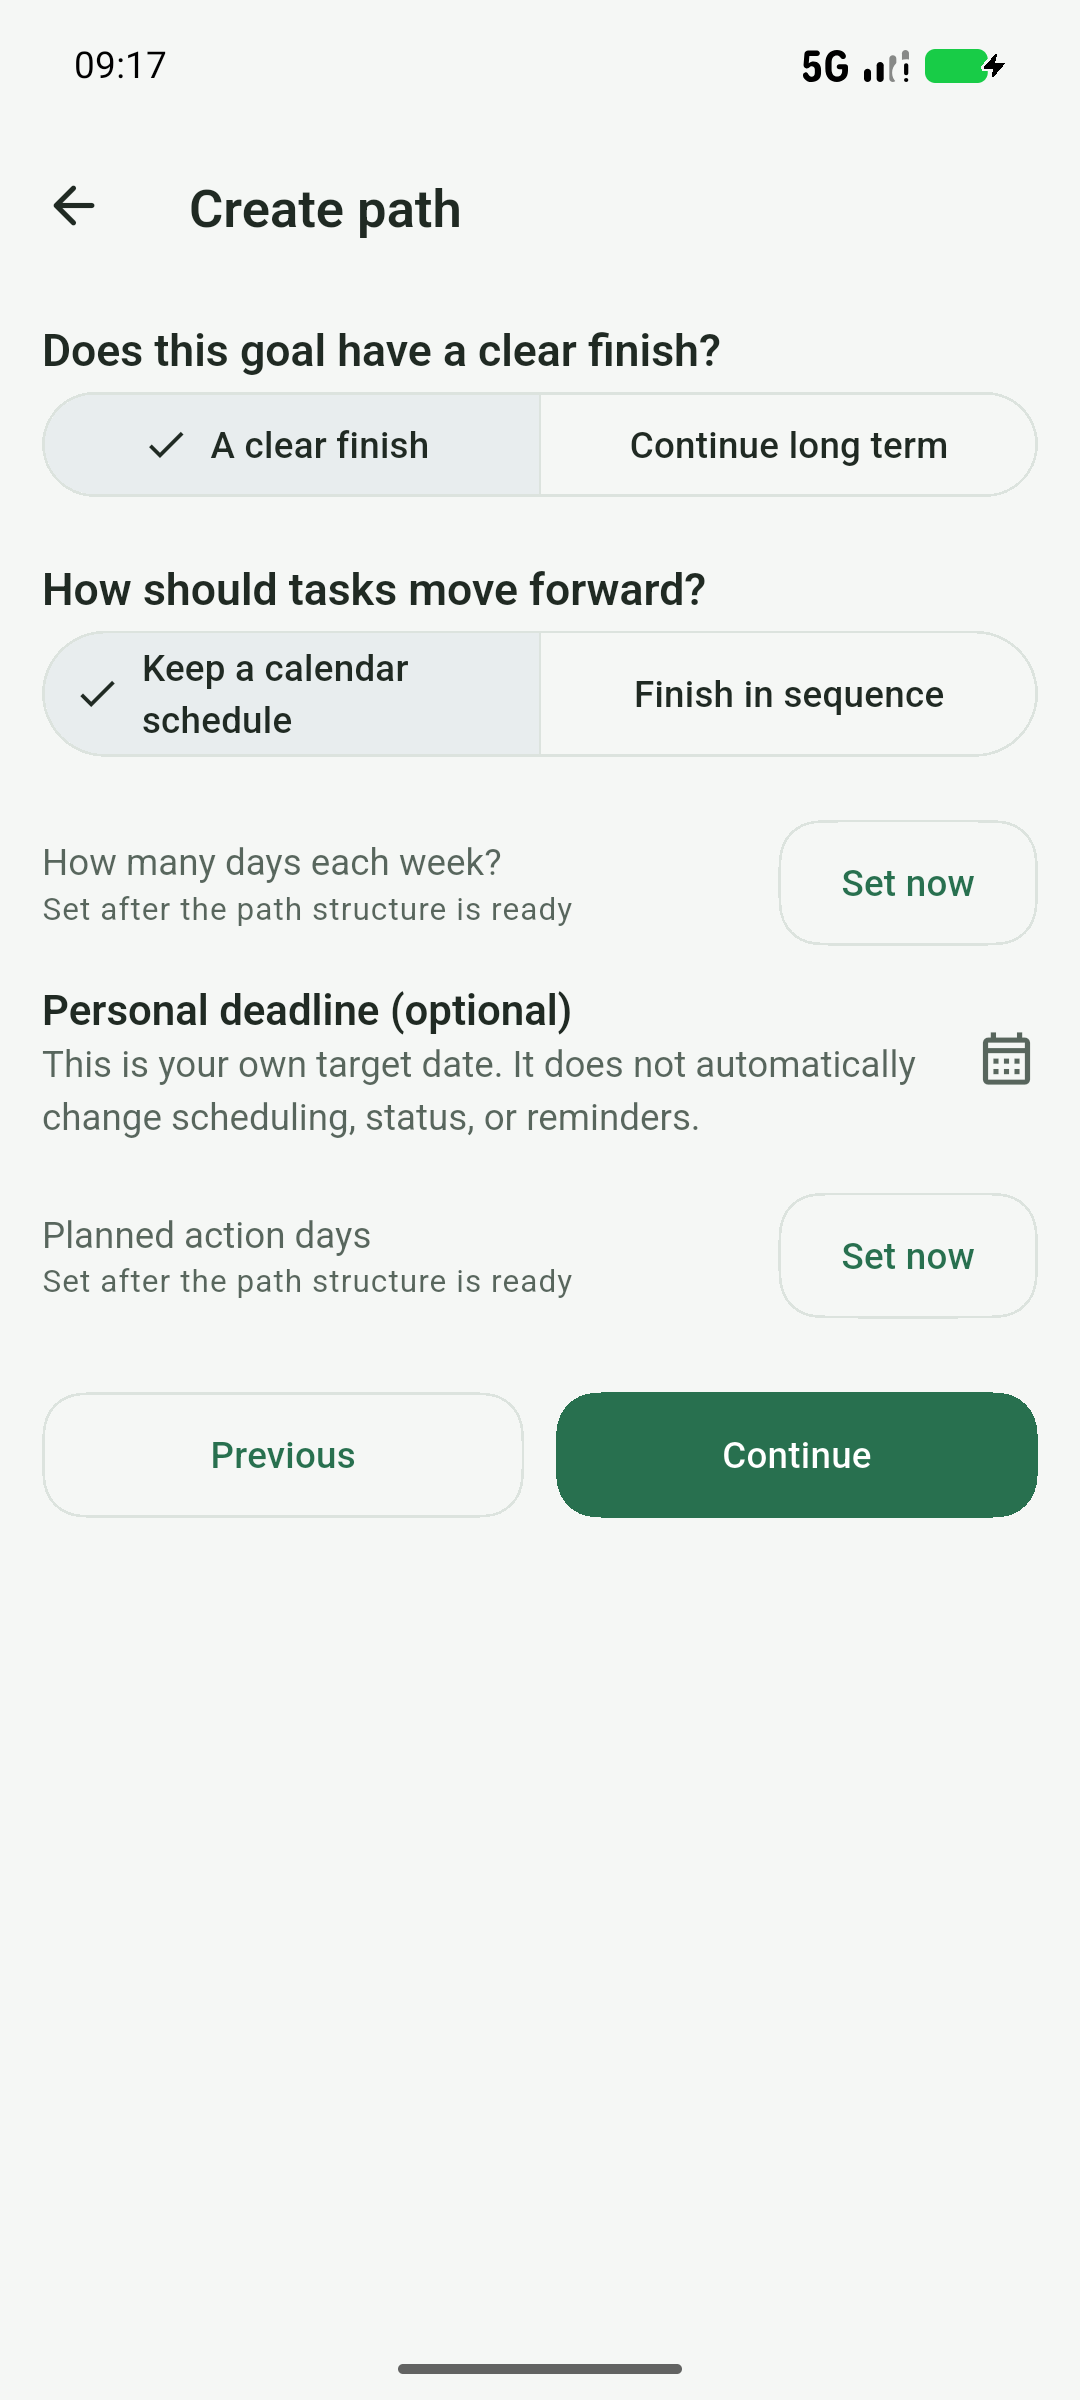
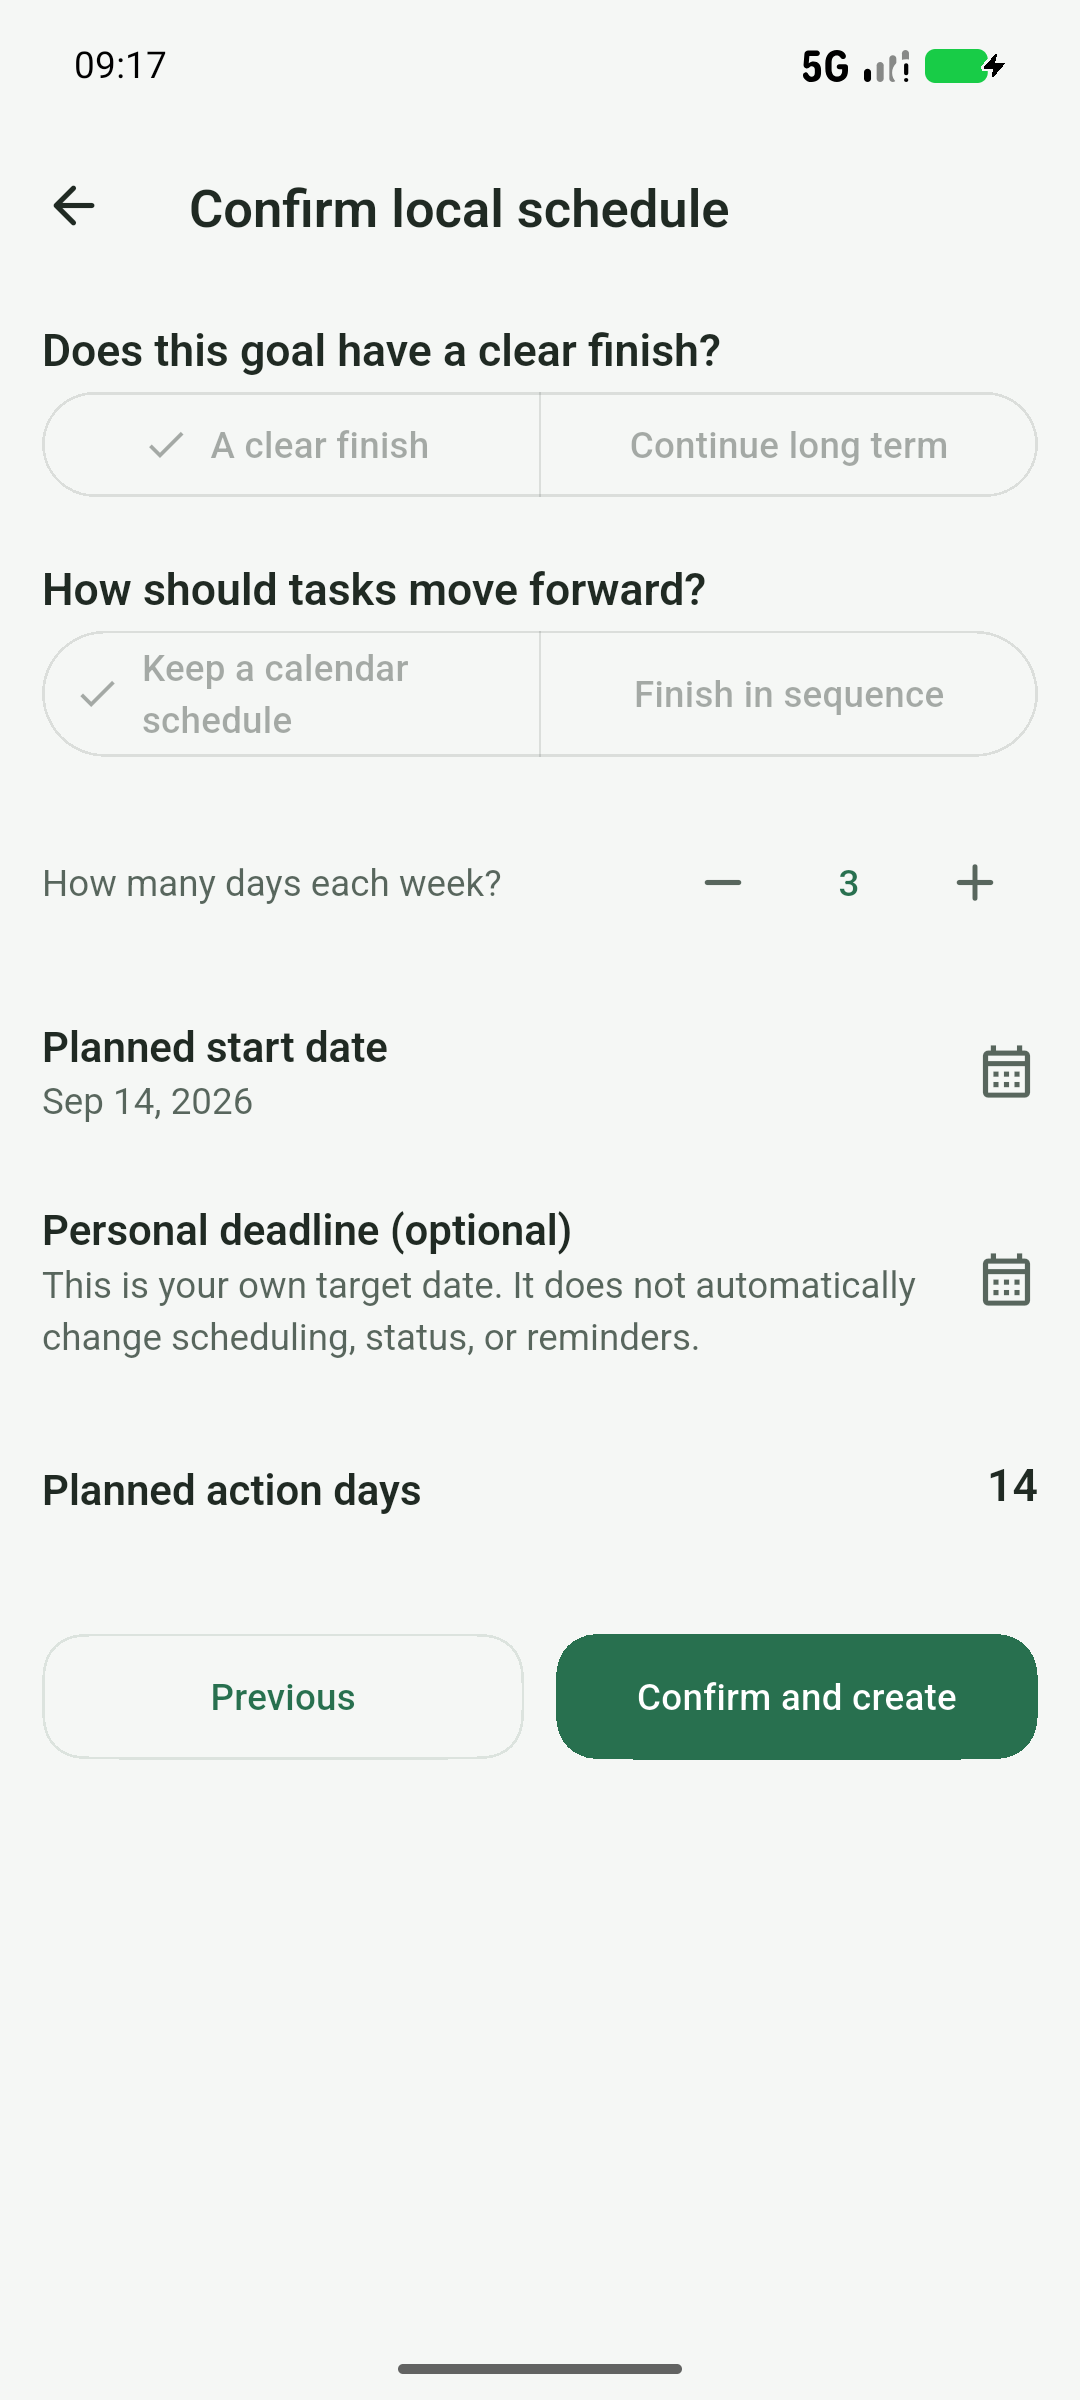
- Choose a finishable goal and date-based progress for recurring practice. An ongoing goal suits habits without a fixed end.
- Days per week describes frequency. Planned action days counts days of work, not elapsed calendar days. A personal deadline is a separate, optional constraint.
- You can leave action days and the personal deadline unset. Build the structure first when planning manually, or let AI suggest a schedule. Set them when you want AI to work within a particular timeframe.
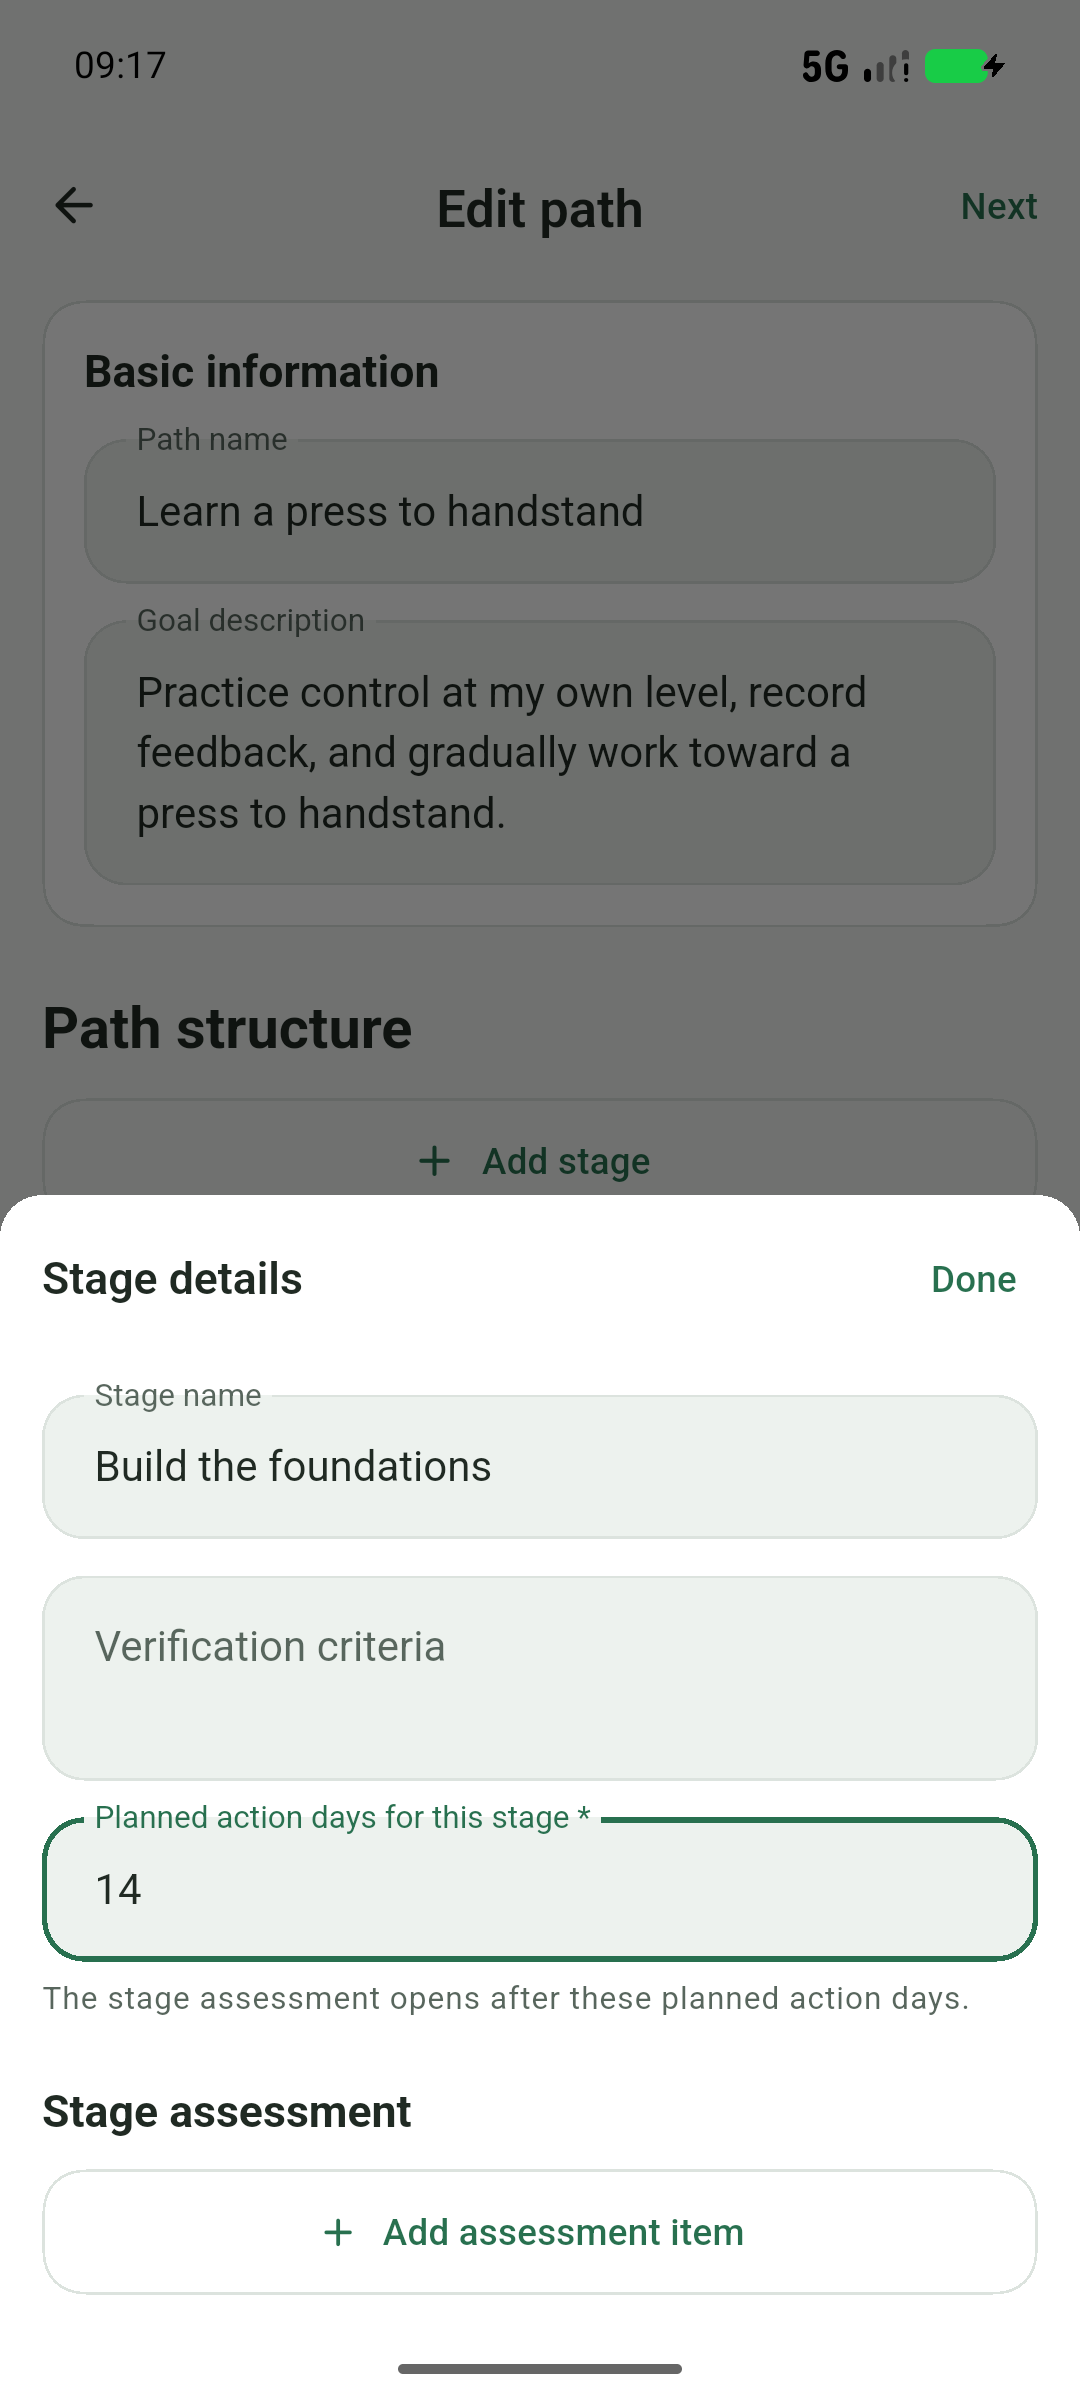
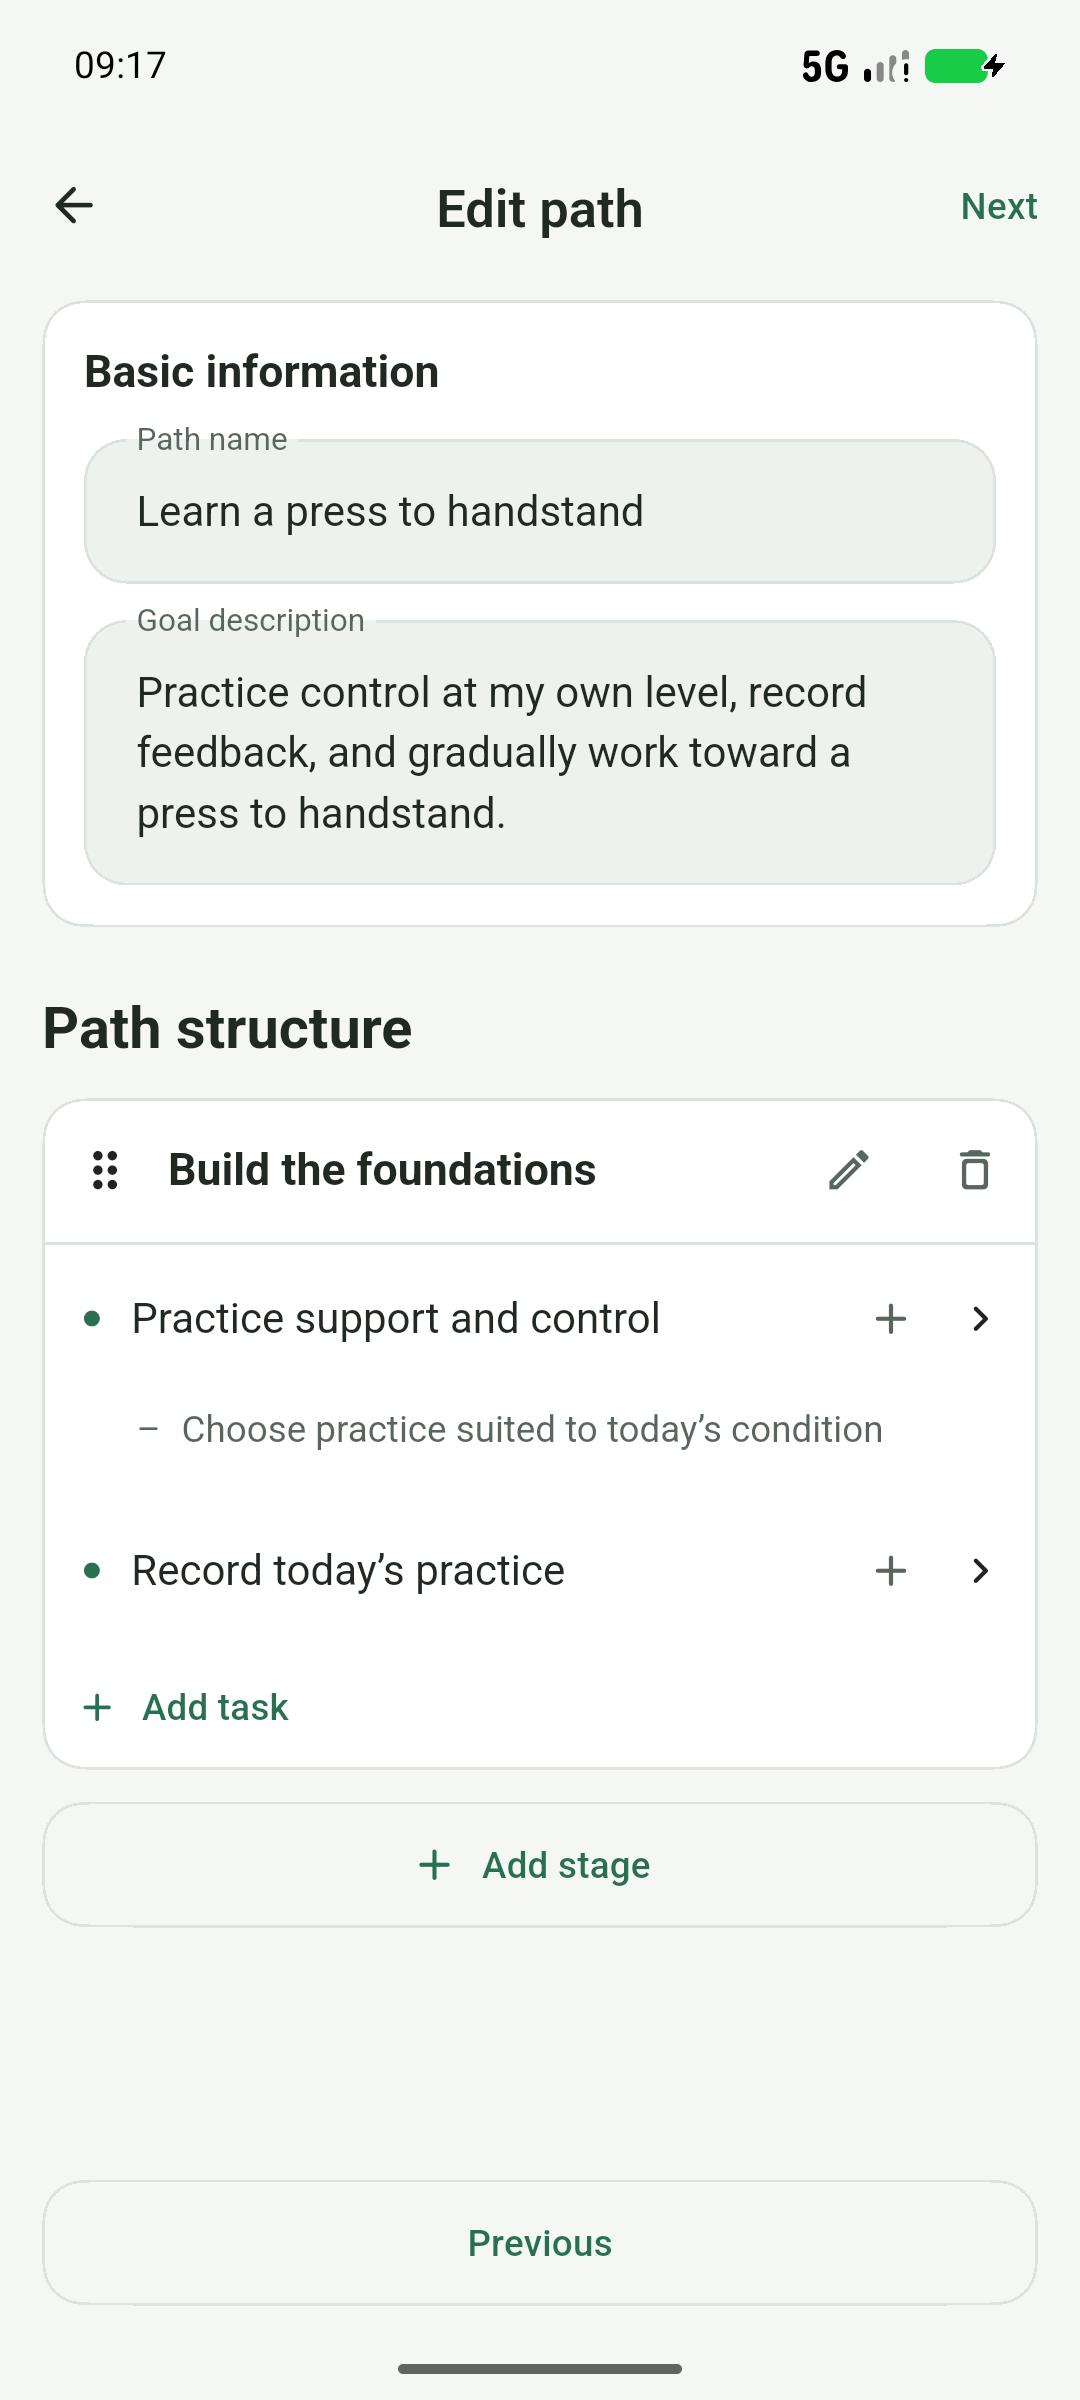
- Add a “Build the foundations” stage. This example uses 14 action days. Add “Practice support and control” and “Record today’s practice”.
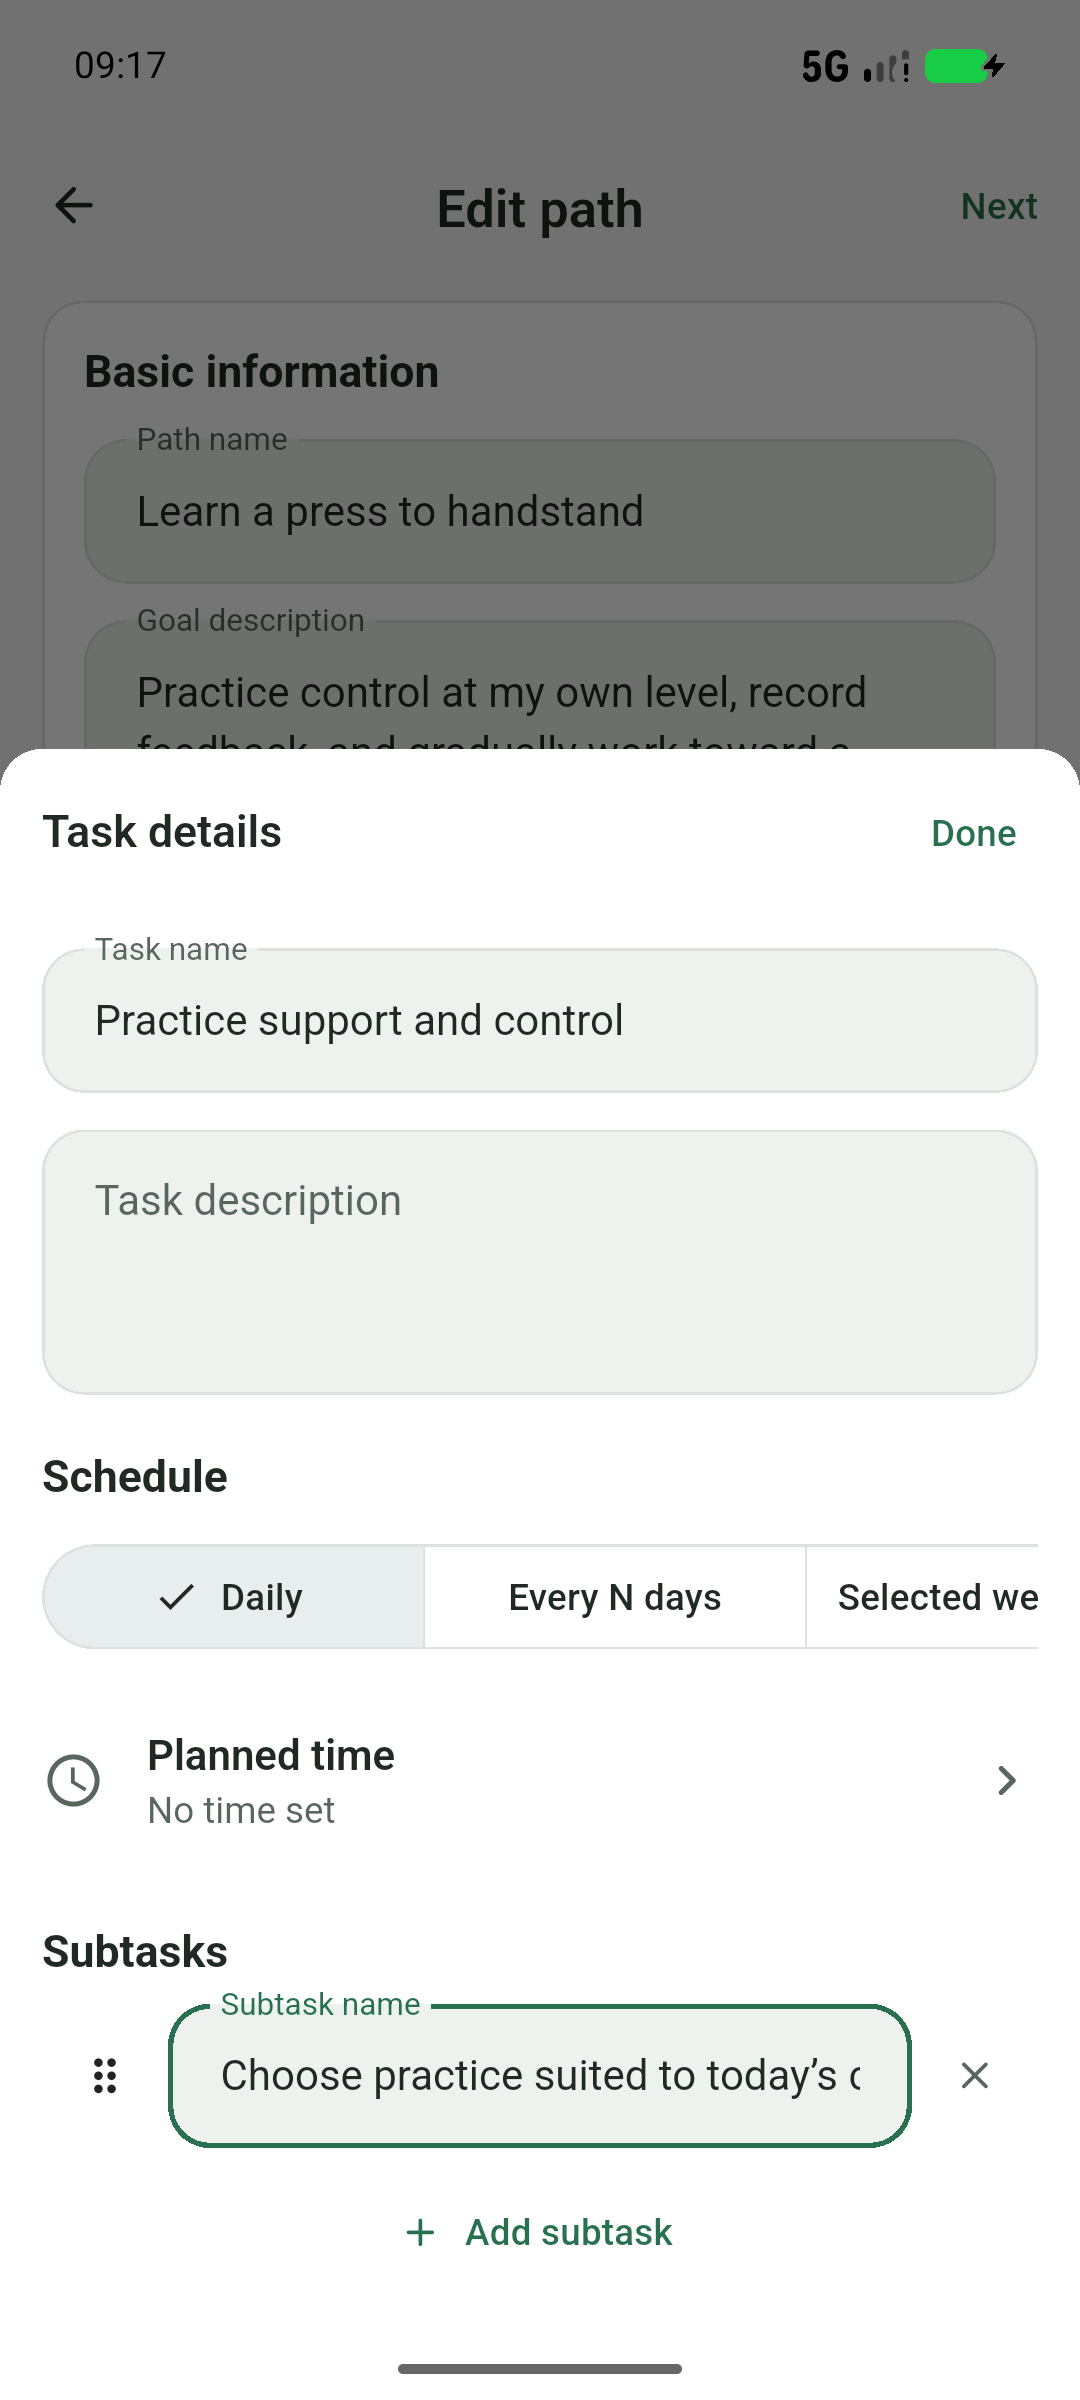
- Open each task and choose Daily for this example, so it repeats on each action day. Add a description and optional planned time. Use up to 10 first-level subtasks for checkable steps.
- Review the structure and continue. Confirm the start date and schedule, then select Confirm and create path to create the actual path.
What about “Build your own agent from scratch”?
Use progress-based planning: add action days, then one or more tasks within each day. Define a use case, connect a model, make a tool call and test the workflow. The structure determines the action-day count. Tasks in one action day stay grouped; multiple tasks do not require separate days.
03 · Take today’s step
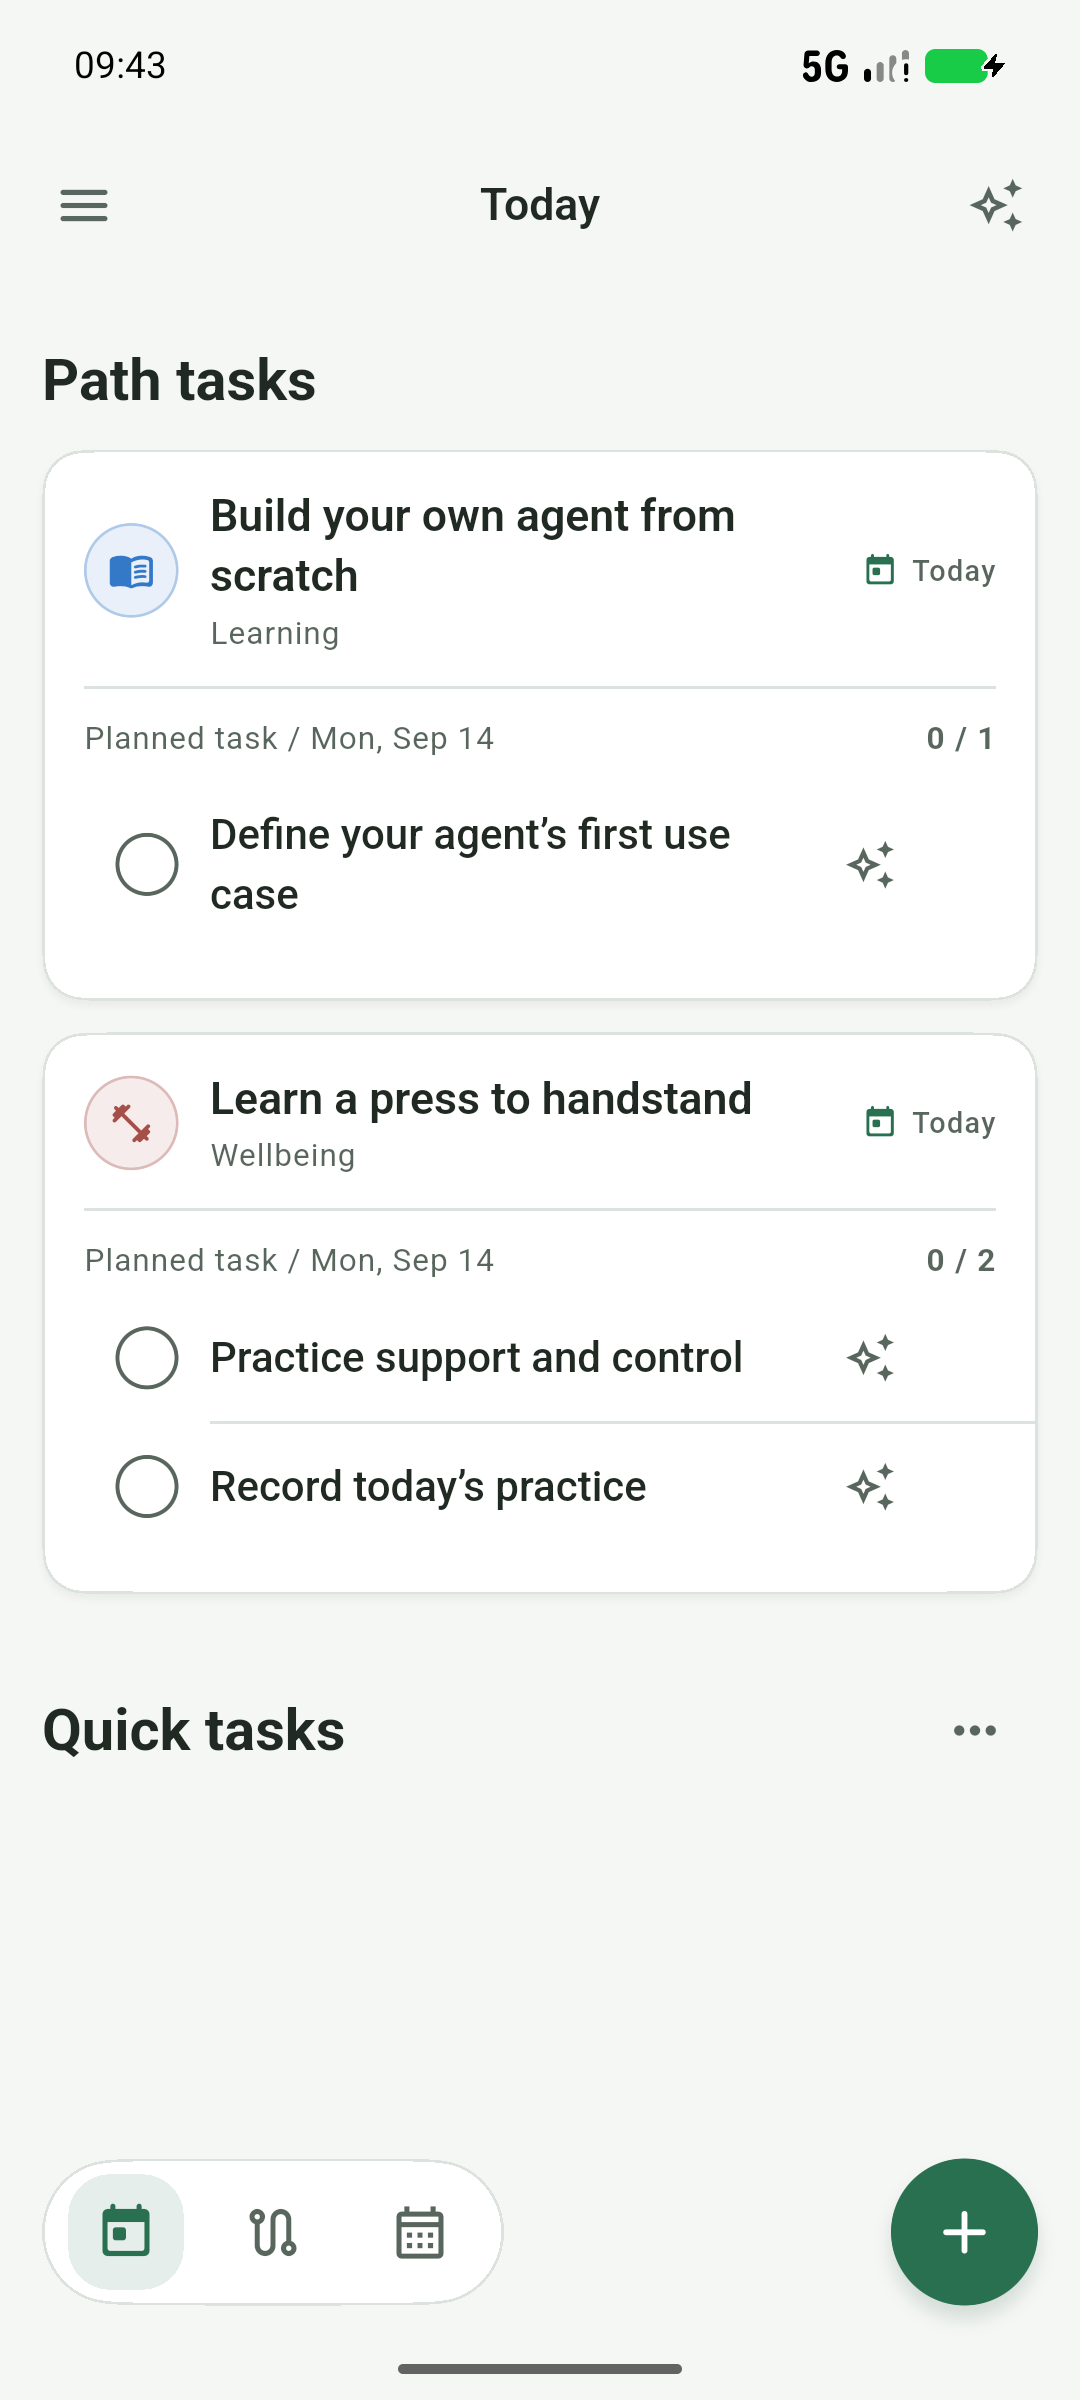
- Return to Today. Each path card groups work by action day. Check off completed work and use the arrow to expand subtasks.
- Tap again to undo a check. Path tasks and quick to-dos are managed separately. Use + to add a one-off task and an optional planned time.
- Swipe a path card to use available make-up or pull-forward actions. Pulling forward brings an action-day group; it is different from editing the whole path.
- If a task is too broad, use its AI icon to propose subtasks, review them and apply. Path task decomposition changes the content of future executions; check the effective scope in the confirmation. Quick to-do changes apply immediately.
04 · See the plan and adjust when needed
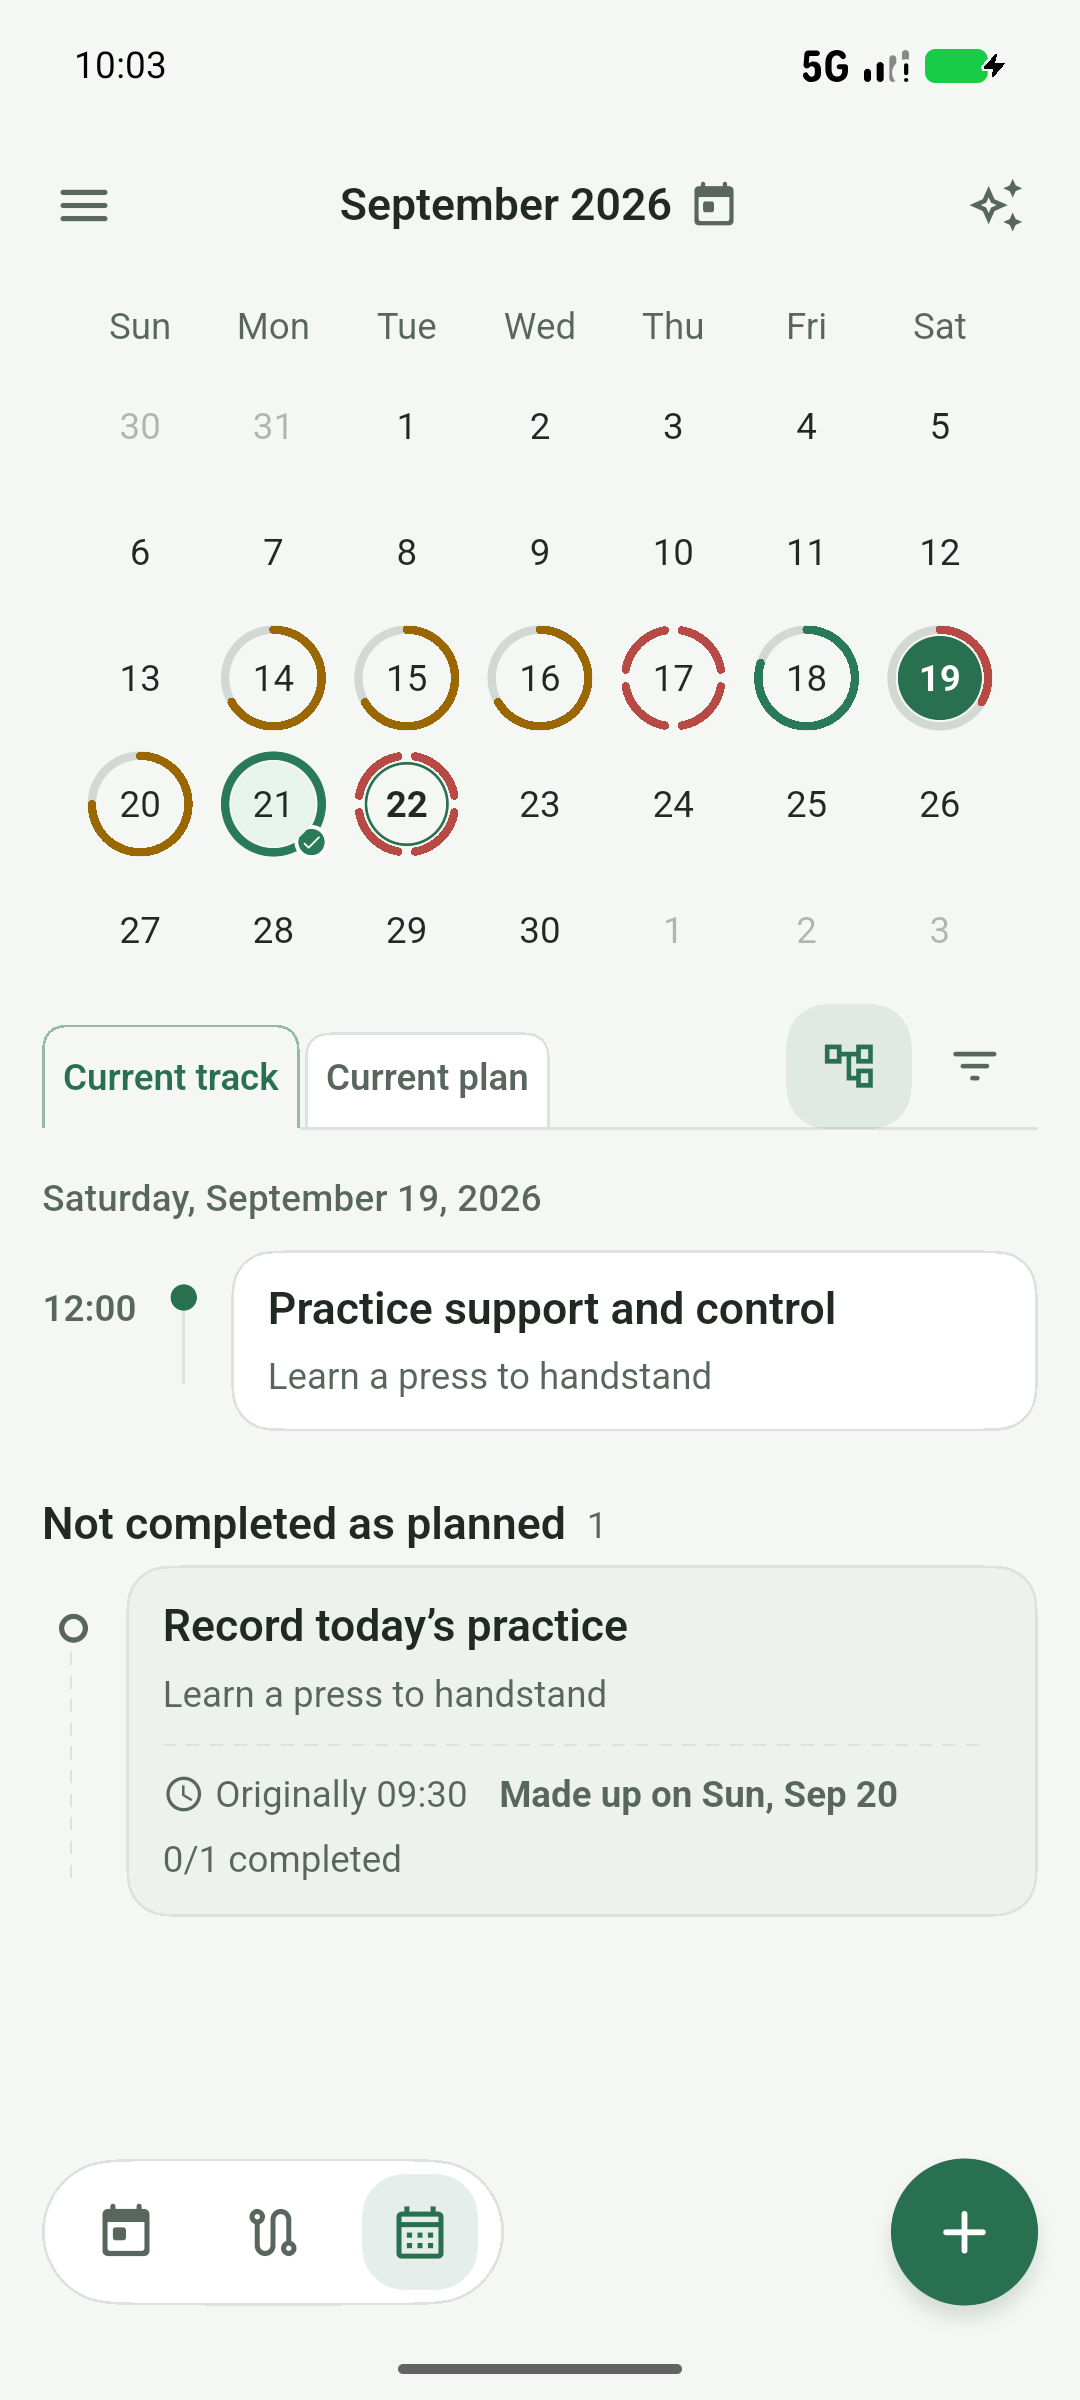
- Open Calendar. Swipe vertically to expand or collapse and horizontally to change week or month. Select the header month and year to jump, or use the nearby control to return to today.
- Switch to the current plan to see scheduled work. Timed tasks are ordered by time; hollow dots mark planned entries. Switch to the activity track for actual records.
- Domain filters narrow the available paths, then path filters select individual ones. You can select none or find completed paths in the history group.
- To change a plan, open path details and choose Edit or Adjust. The structure reflects the latest saved plan. Review the application timing and impact before changing today’s work. Past activity is not rewritten as a new plan.
05 · Set up and use the AI assistant
AI is optional. Manual planning, tasks, Calendar and reflections work without an API. This example uses DeepSeek: the app prefills the official endpoint, and the provider’s current list is the authority for available models.
- Create an API key on the DeepSeek platform and check that API usage is available for your account. A chat-app membership is separate from API usage.
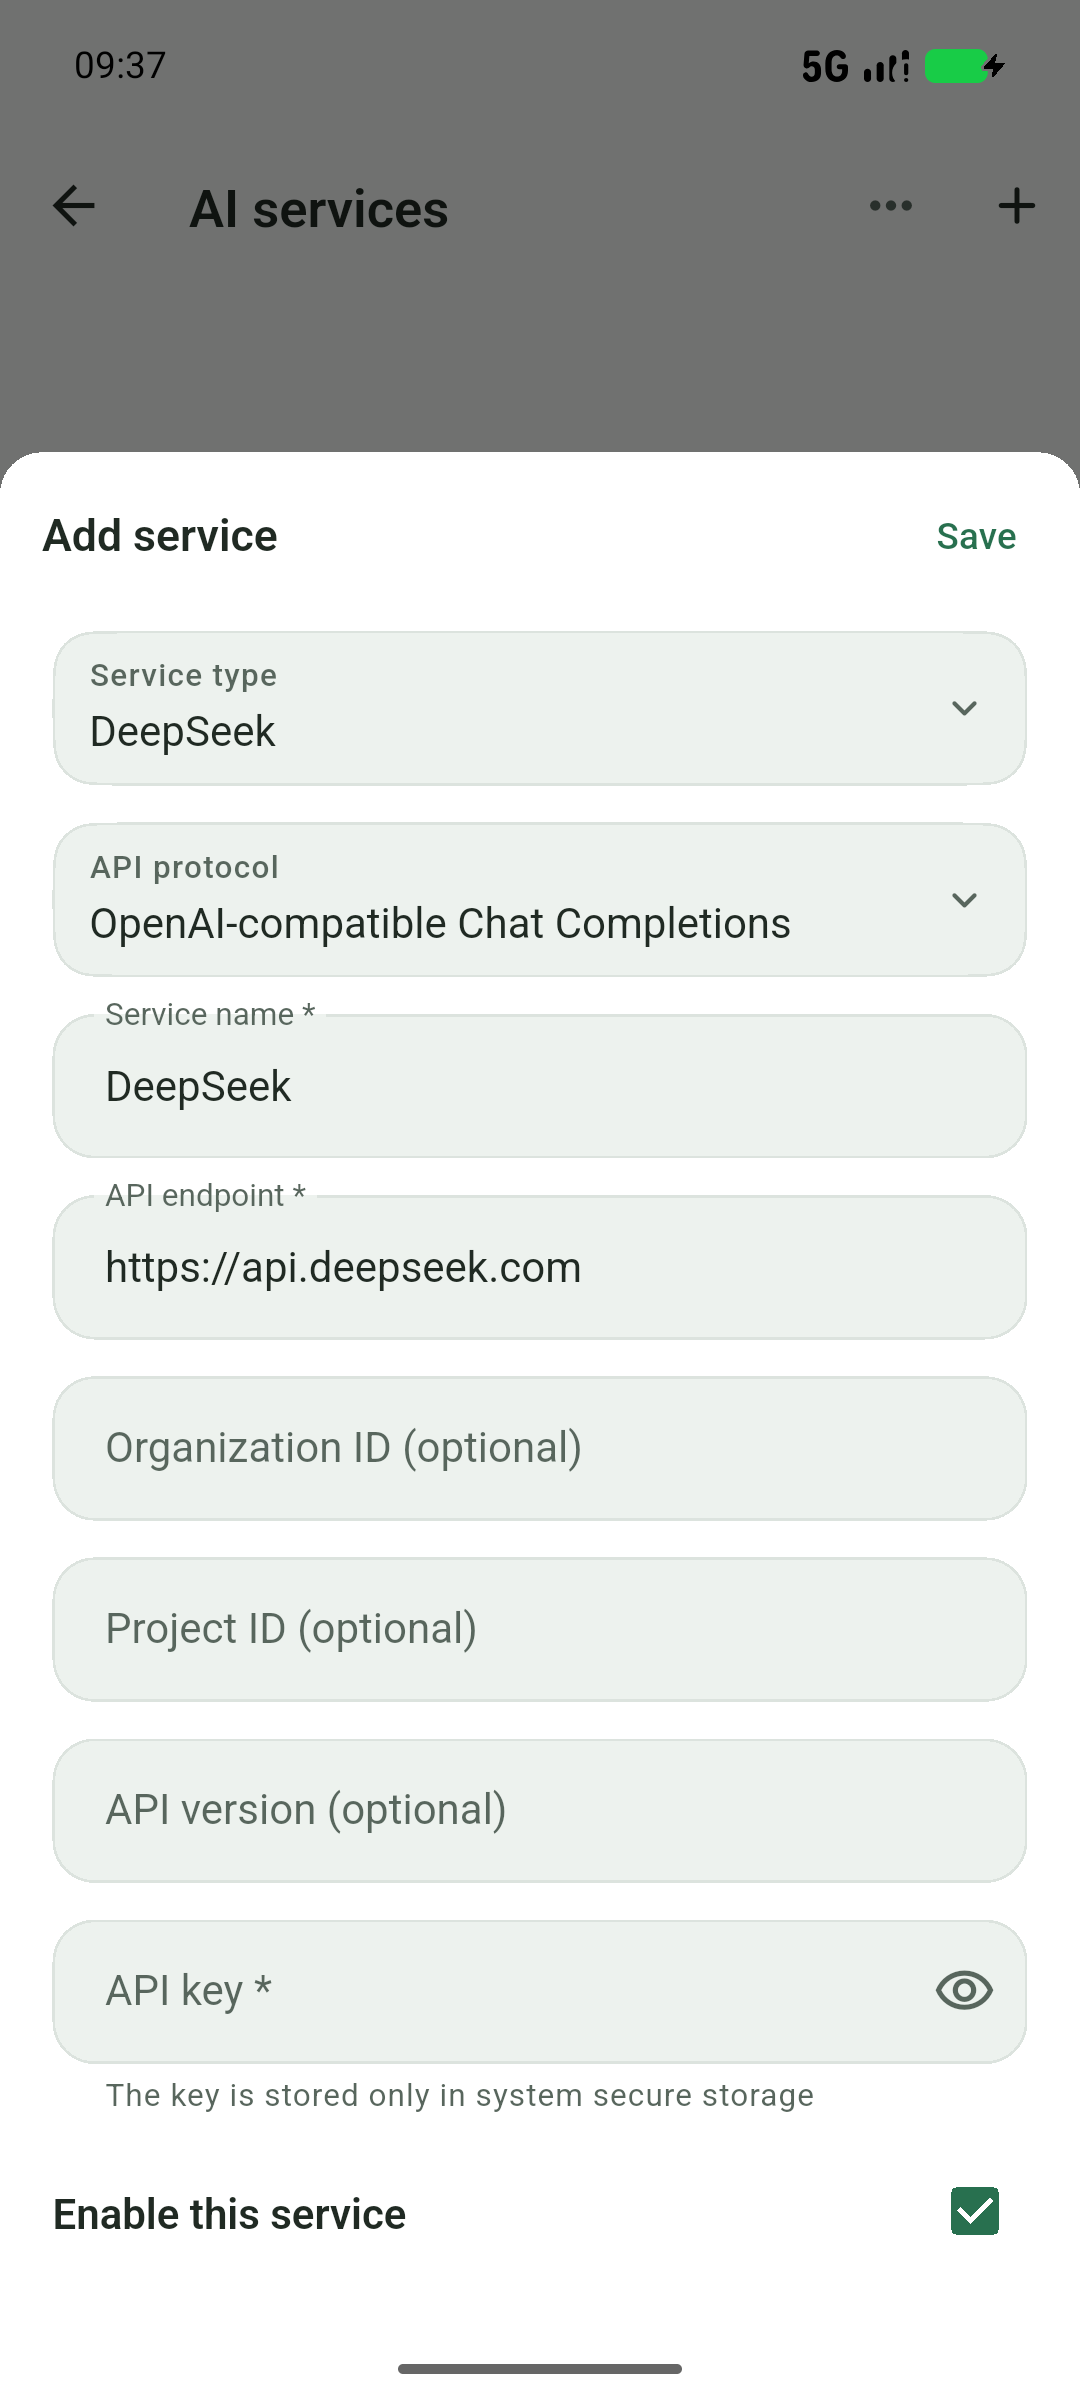
- Open the top-left menu, go to AI services, add a service and choose DeepSeek. Confirm
https://api.deepseek.comand the OpenAI-compatible Chat protocol. - Paste your key into the API Key field and save. Keep it out of goal descriptions, questionnaire answers, reflections and community posts. The illustrated key field is intentionally empty.
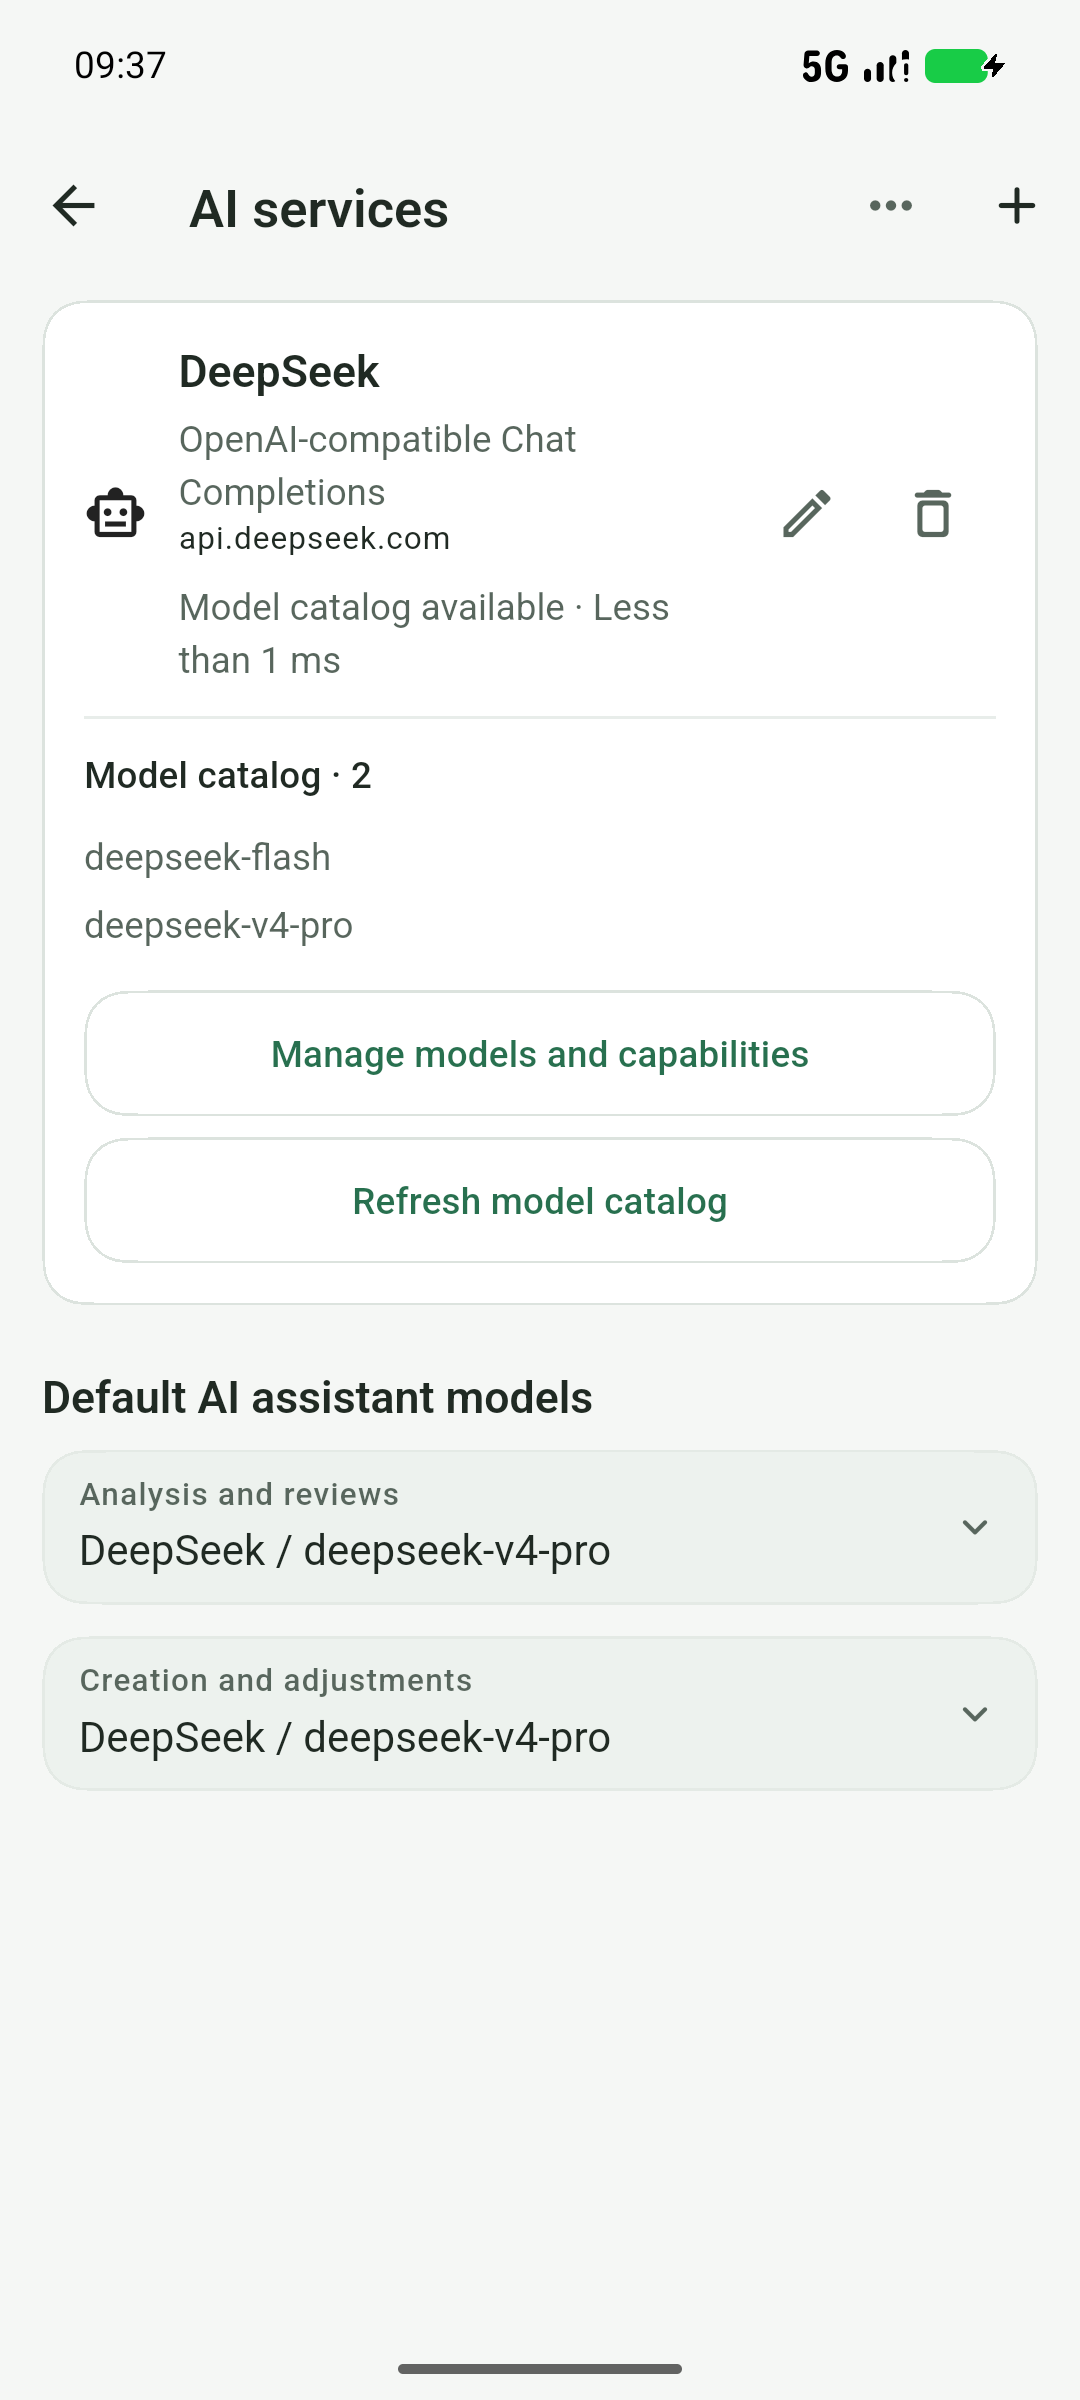
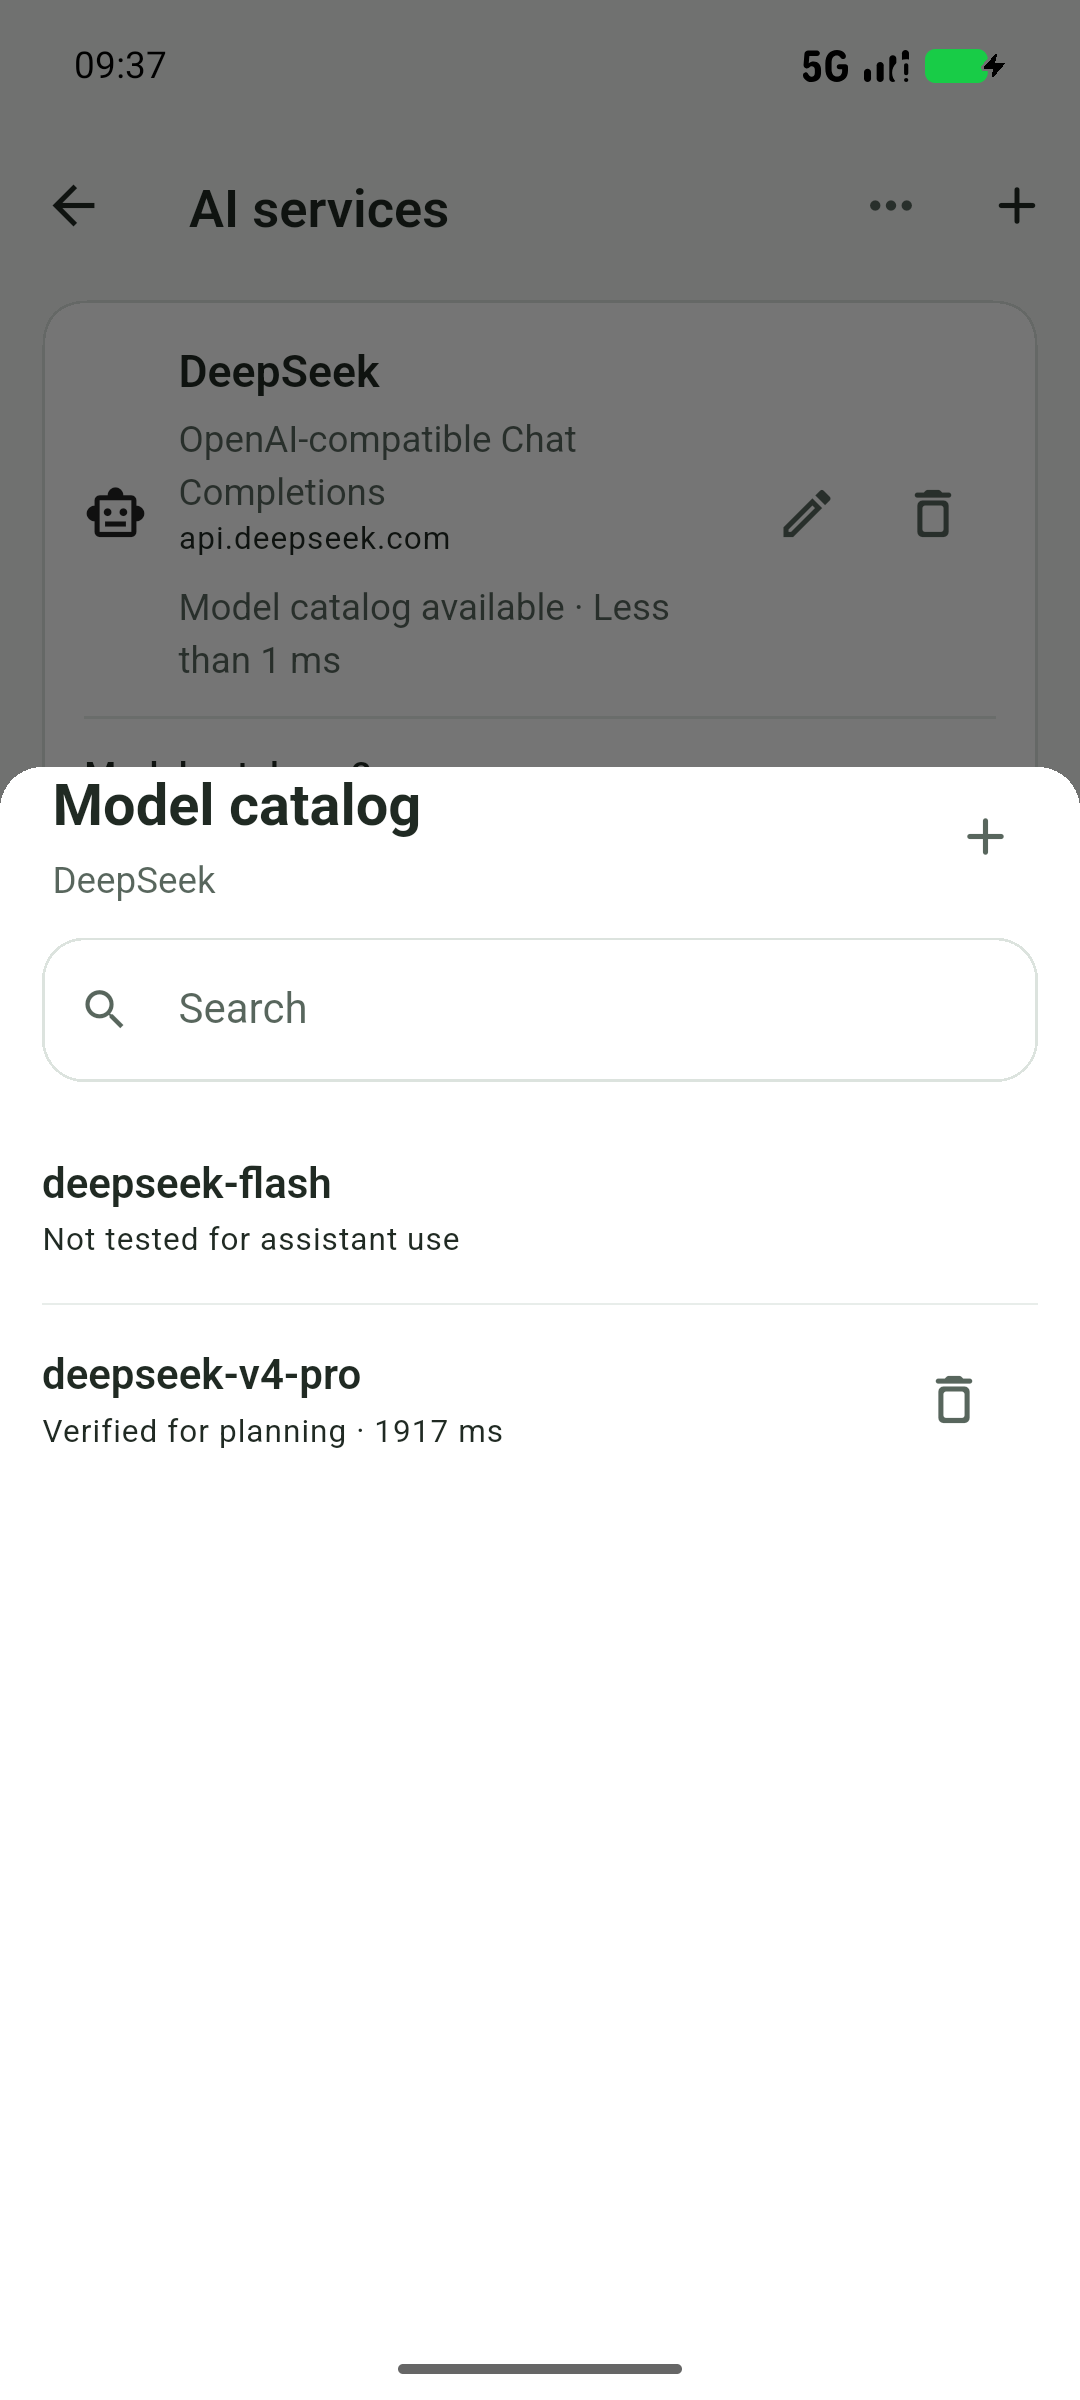
- Fetch the model list and choose a model. If a catalog is unavailable, add its official model ID manually. Test text generation, then structured planning if needed. A successful connection alone does not verify every capability.
- Set defaults for analysis and planning. Both may use the same model after the relevant tests pass. Then return to the workflow you started.
Ask AI to help plan the handstand path
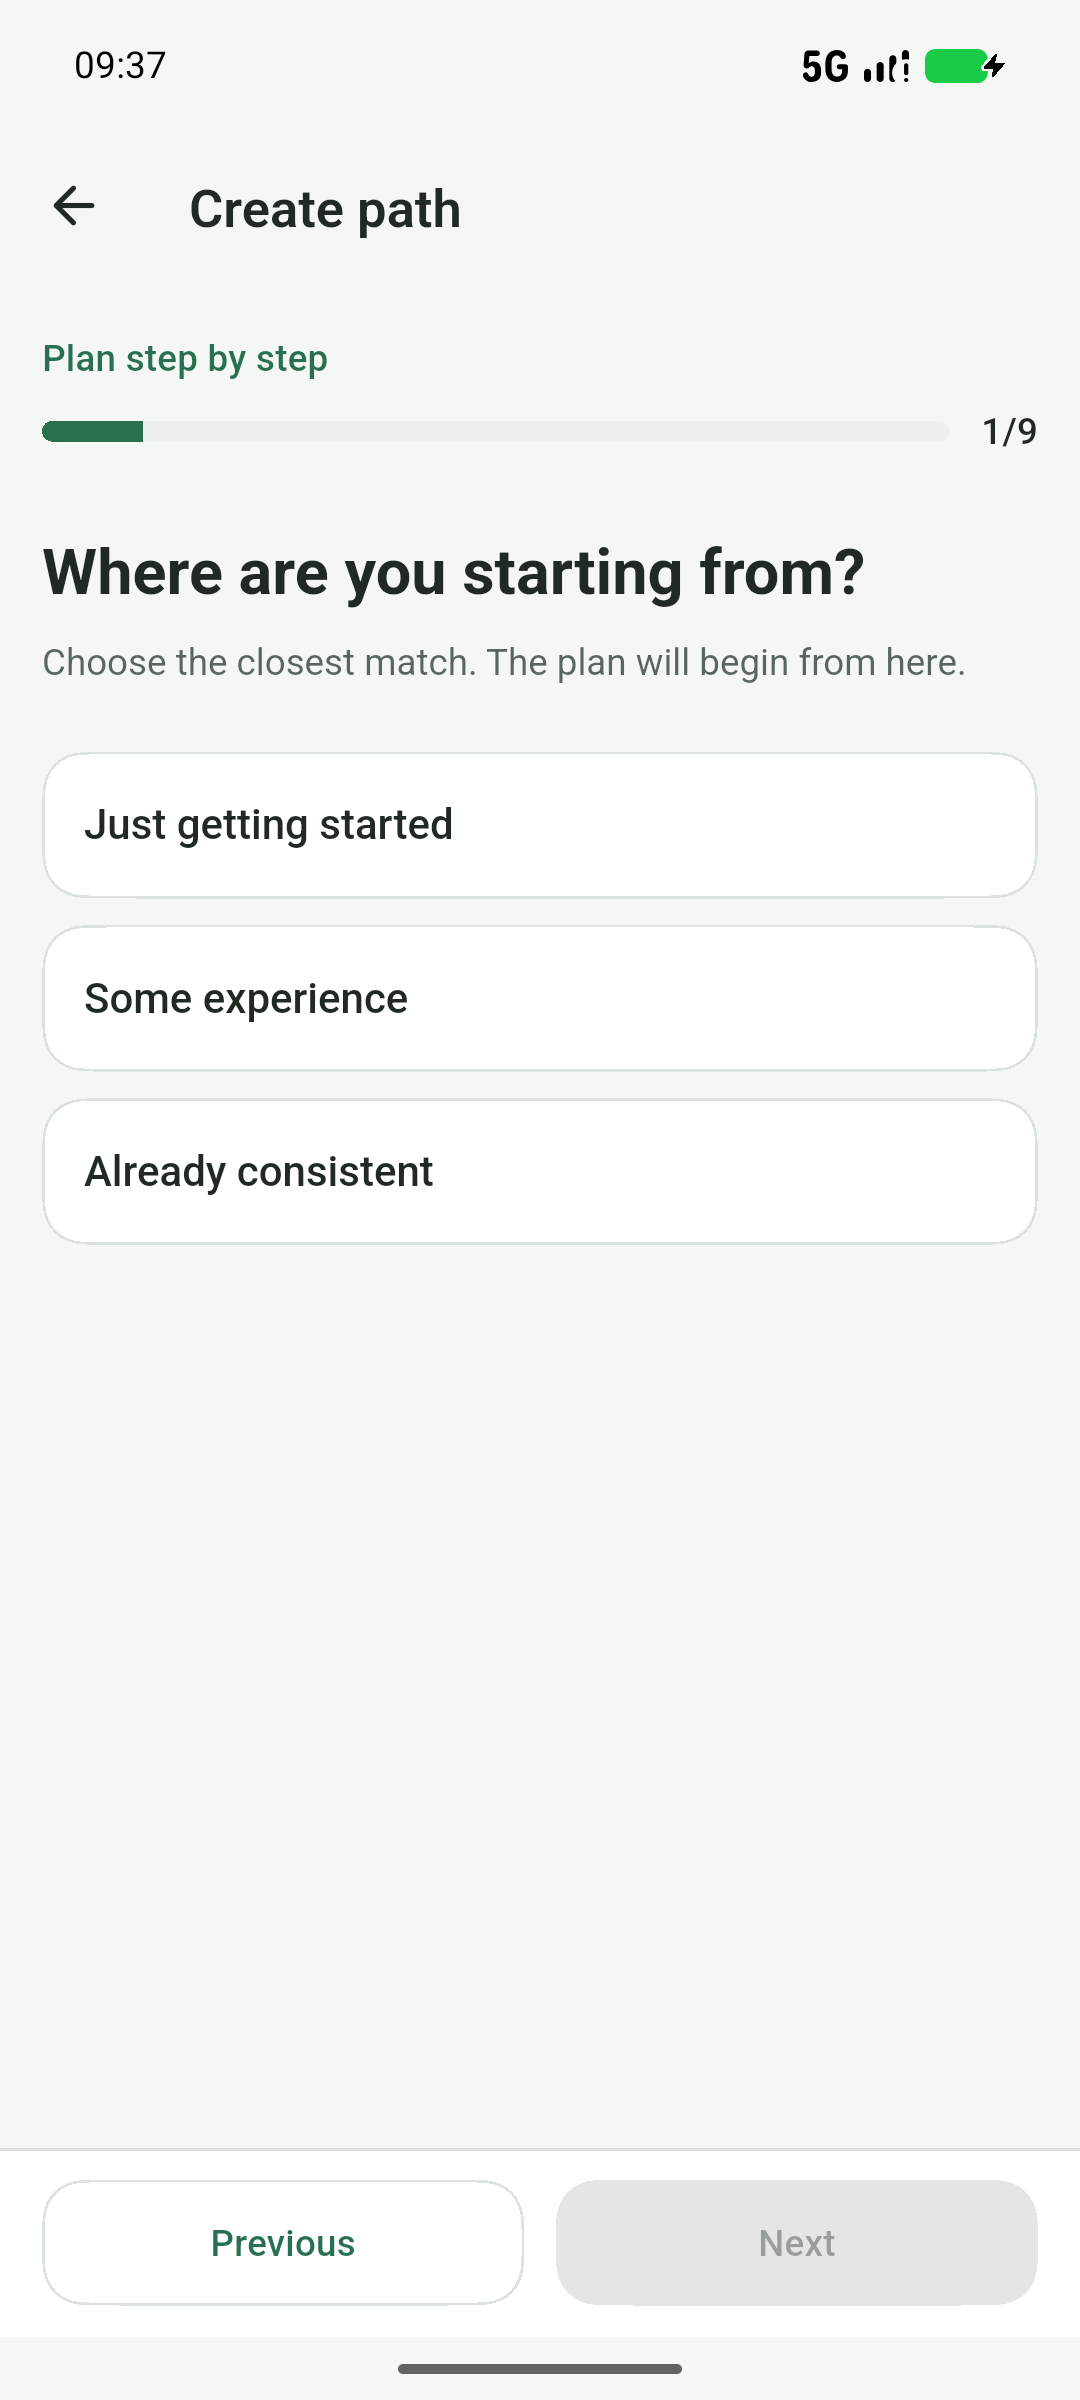
- Choose the in-app assistant during creation. Explain your starting point, availability, constraints and preferences. Skip questions where the interface allows it; do not invent answers just to fill the form.
- Choosing to also save preferences saves them immediately, before path creation finishes. Choose current-goal-only if you do not want to reuse them.
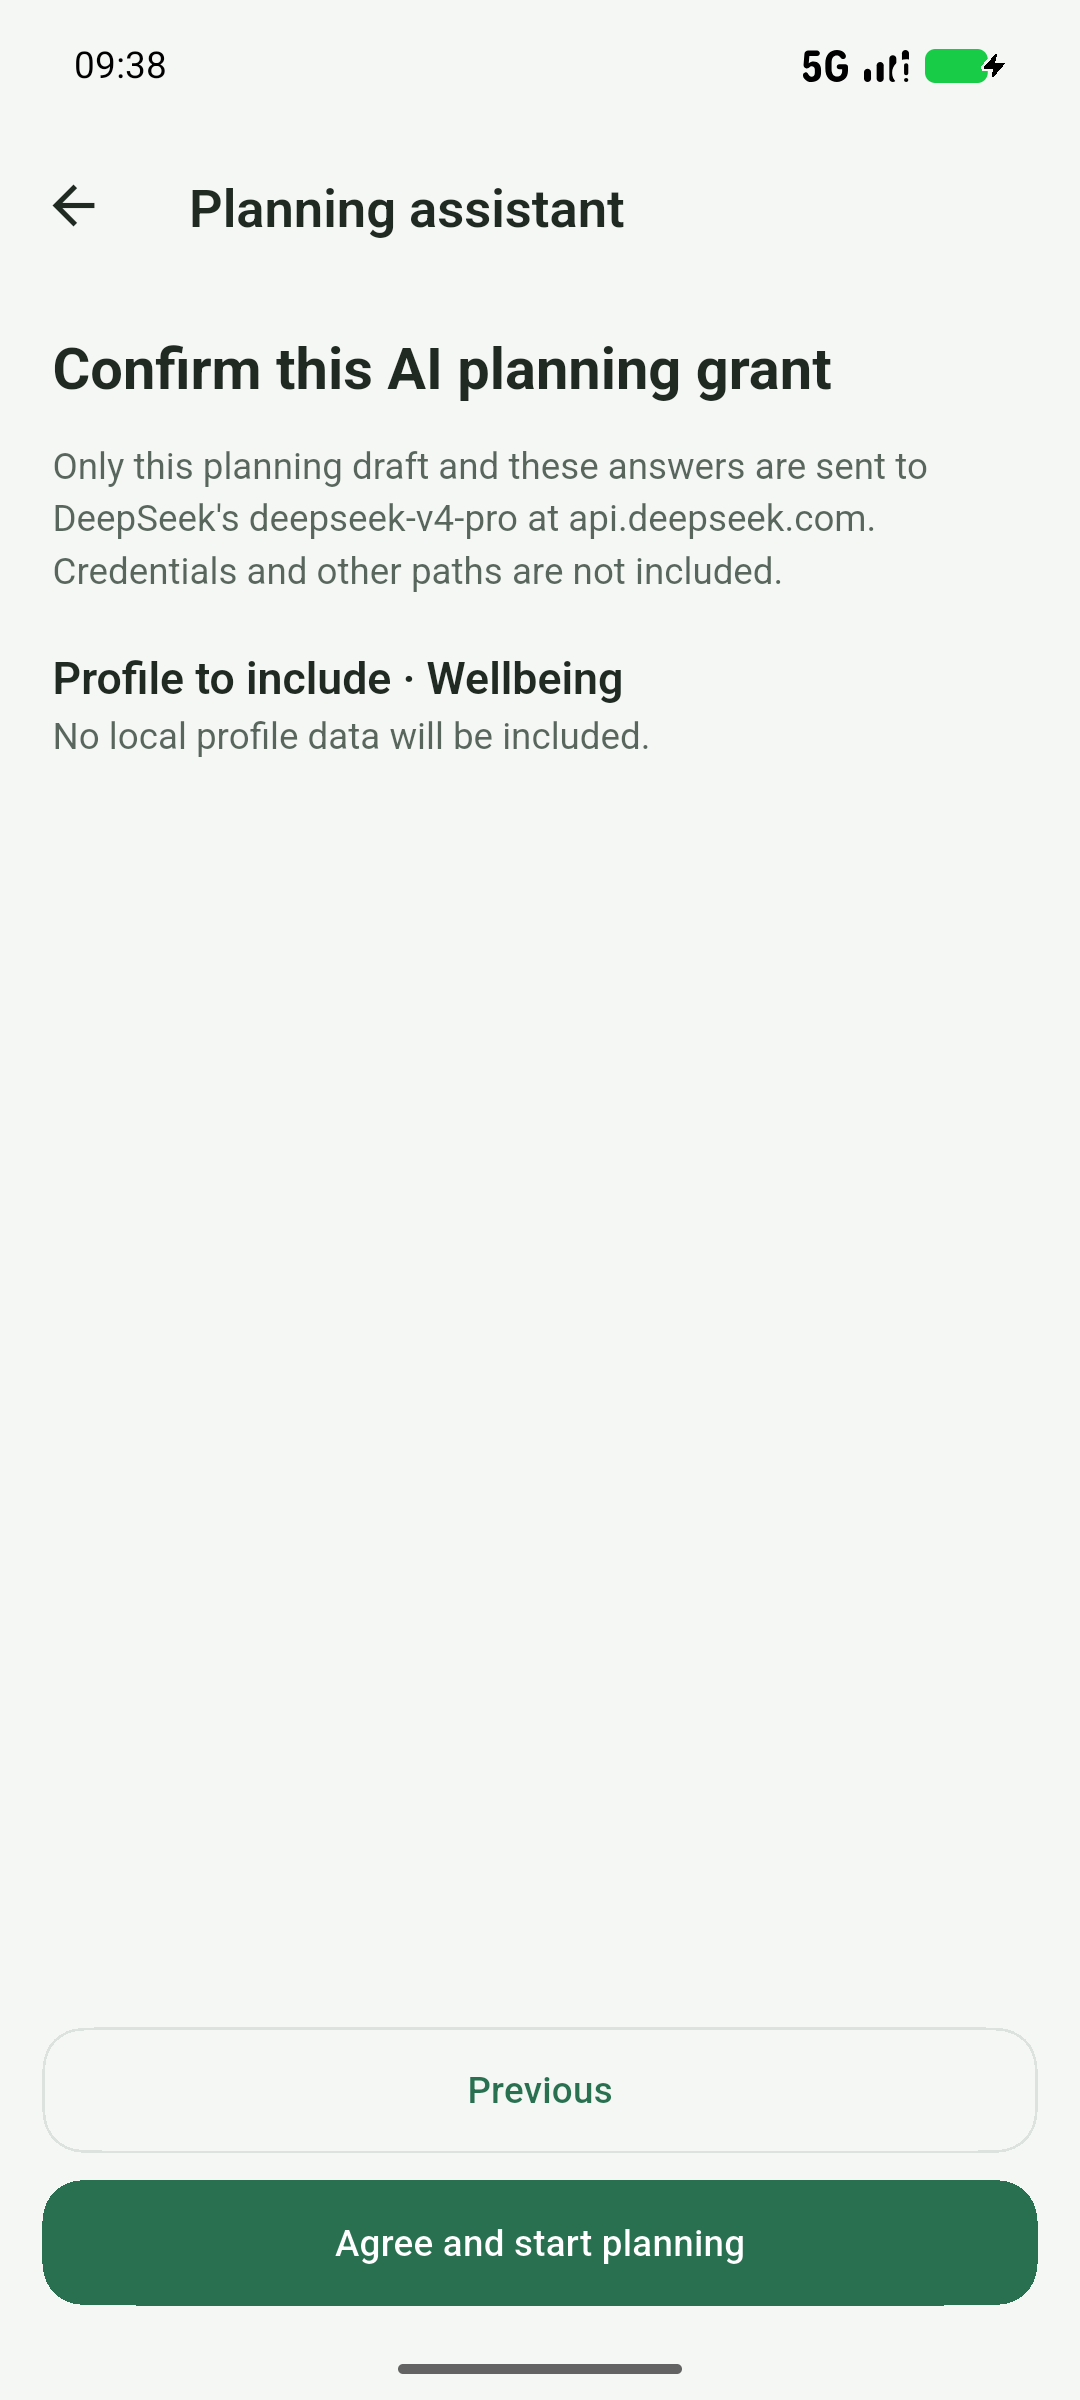
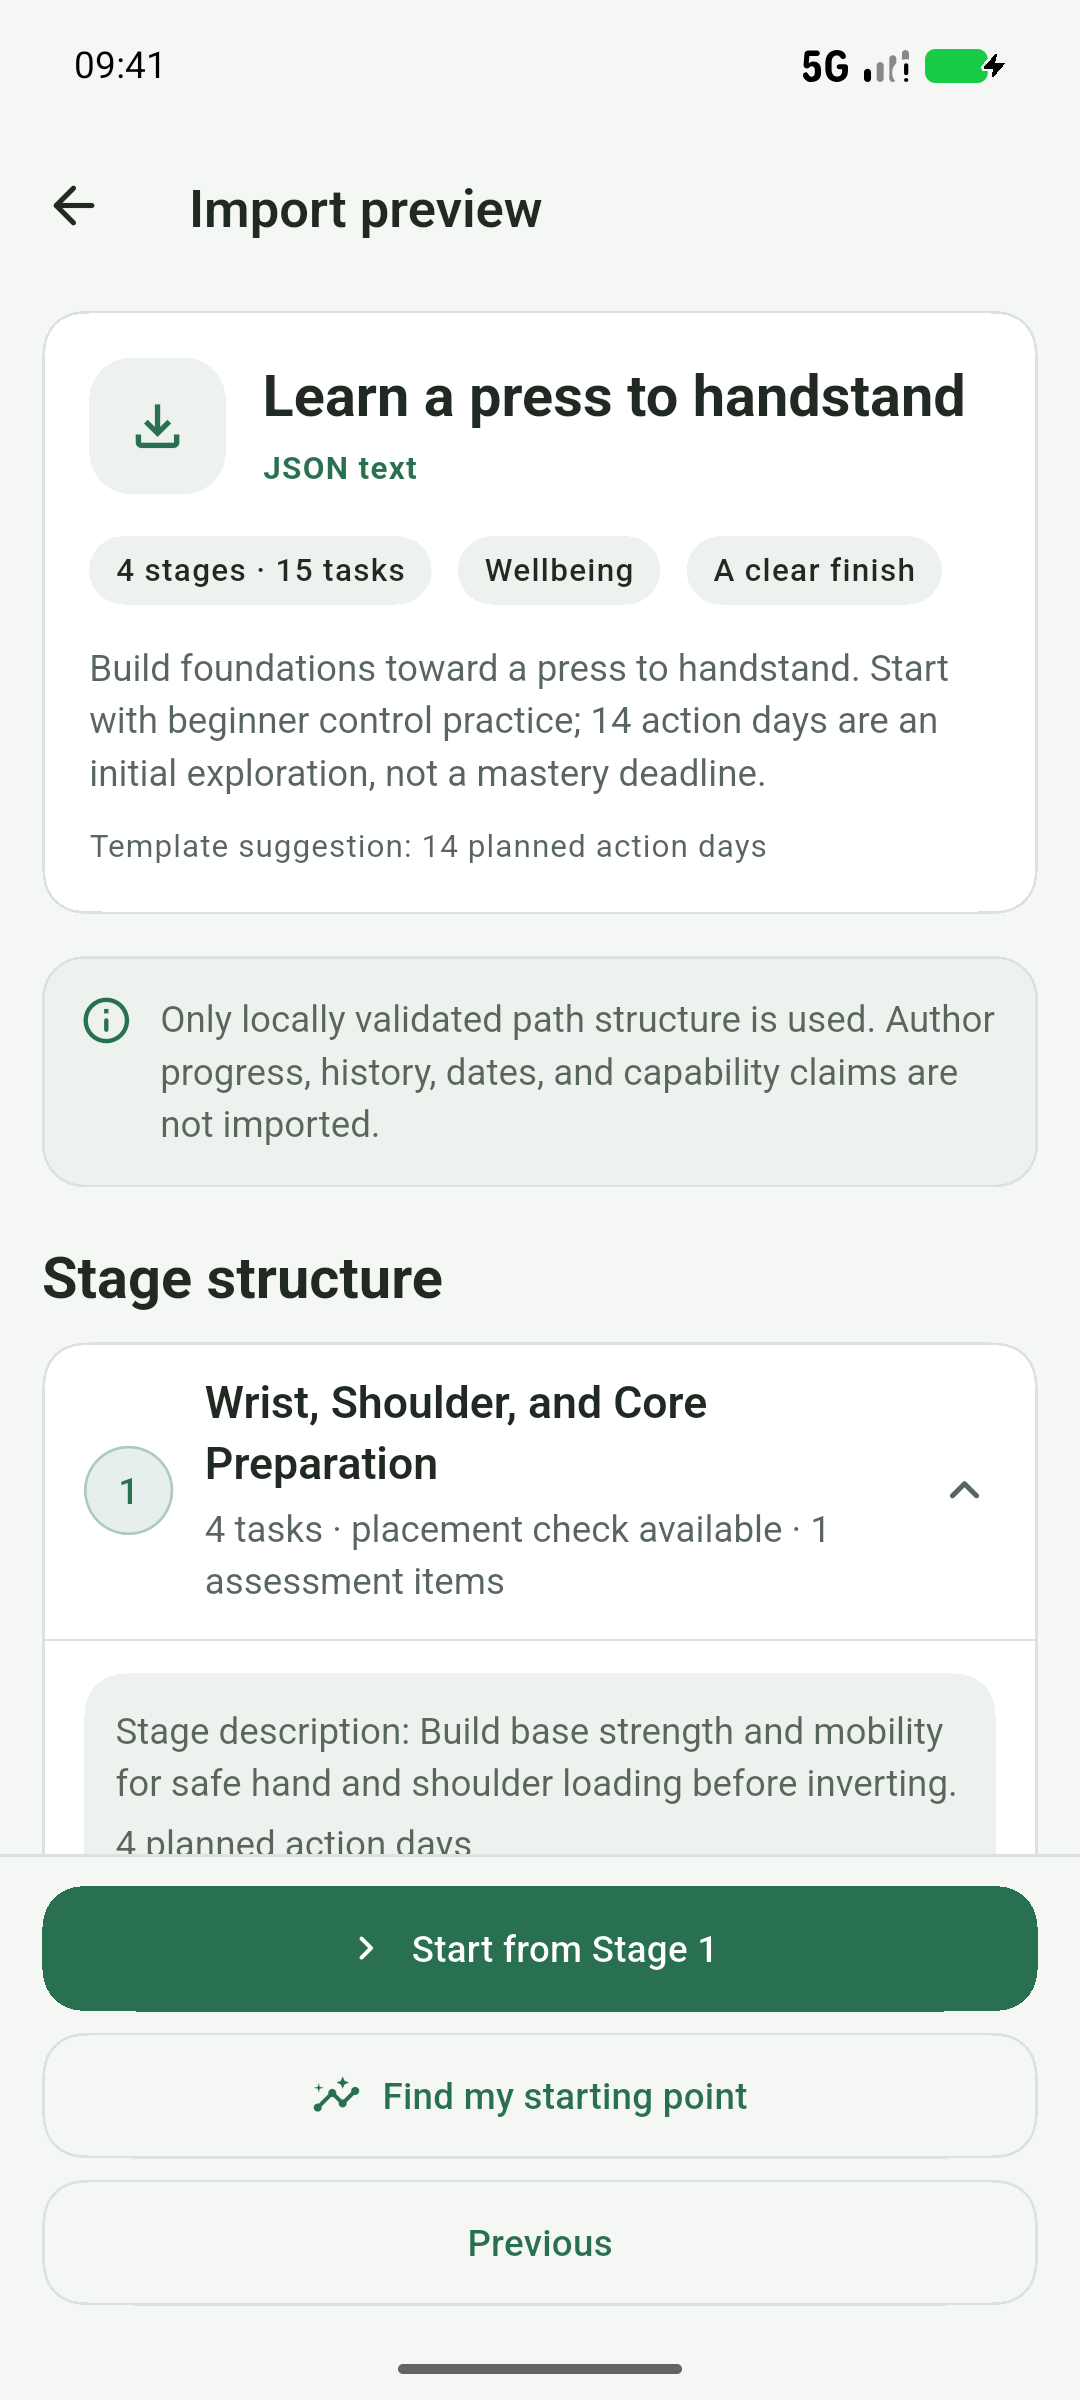
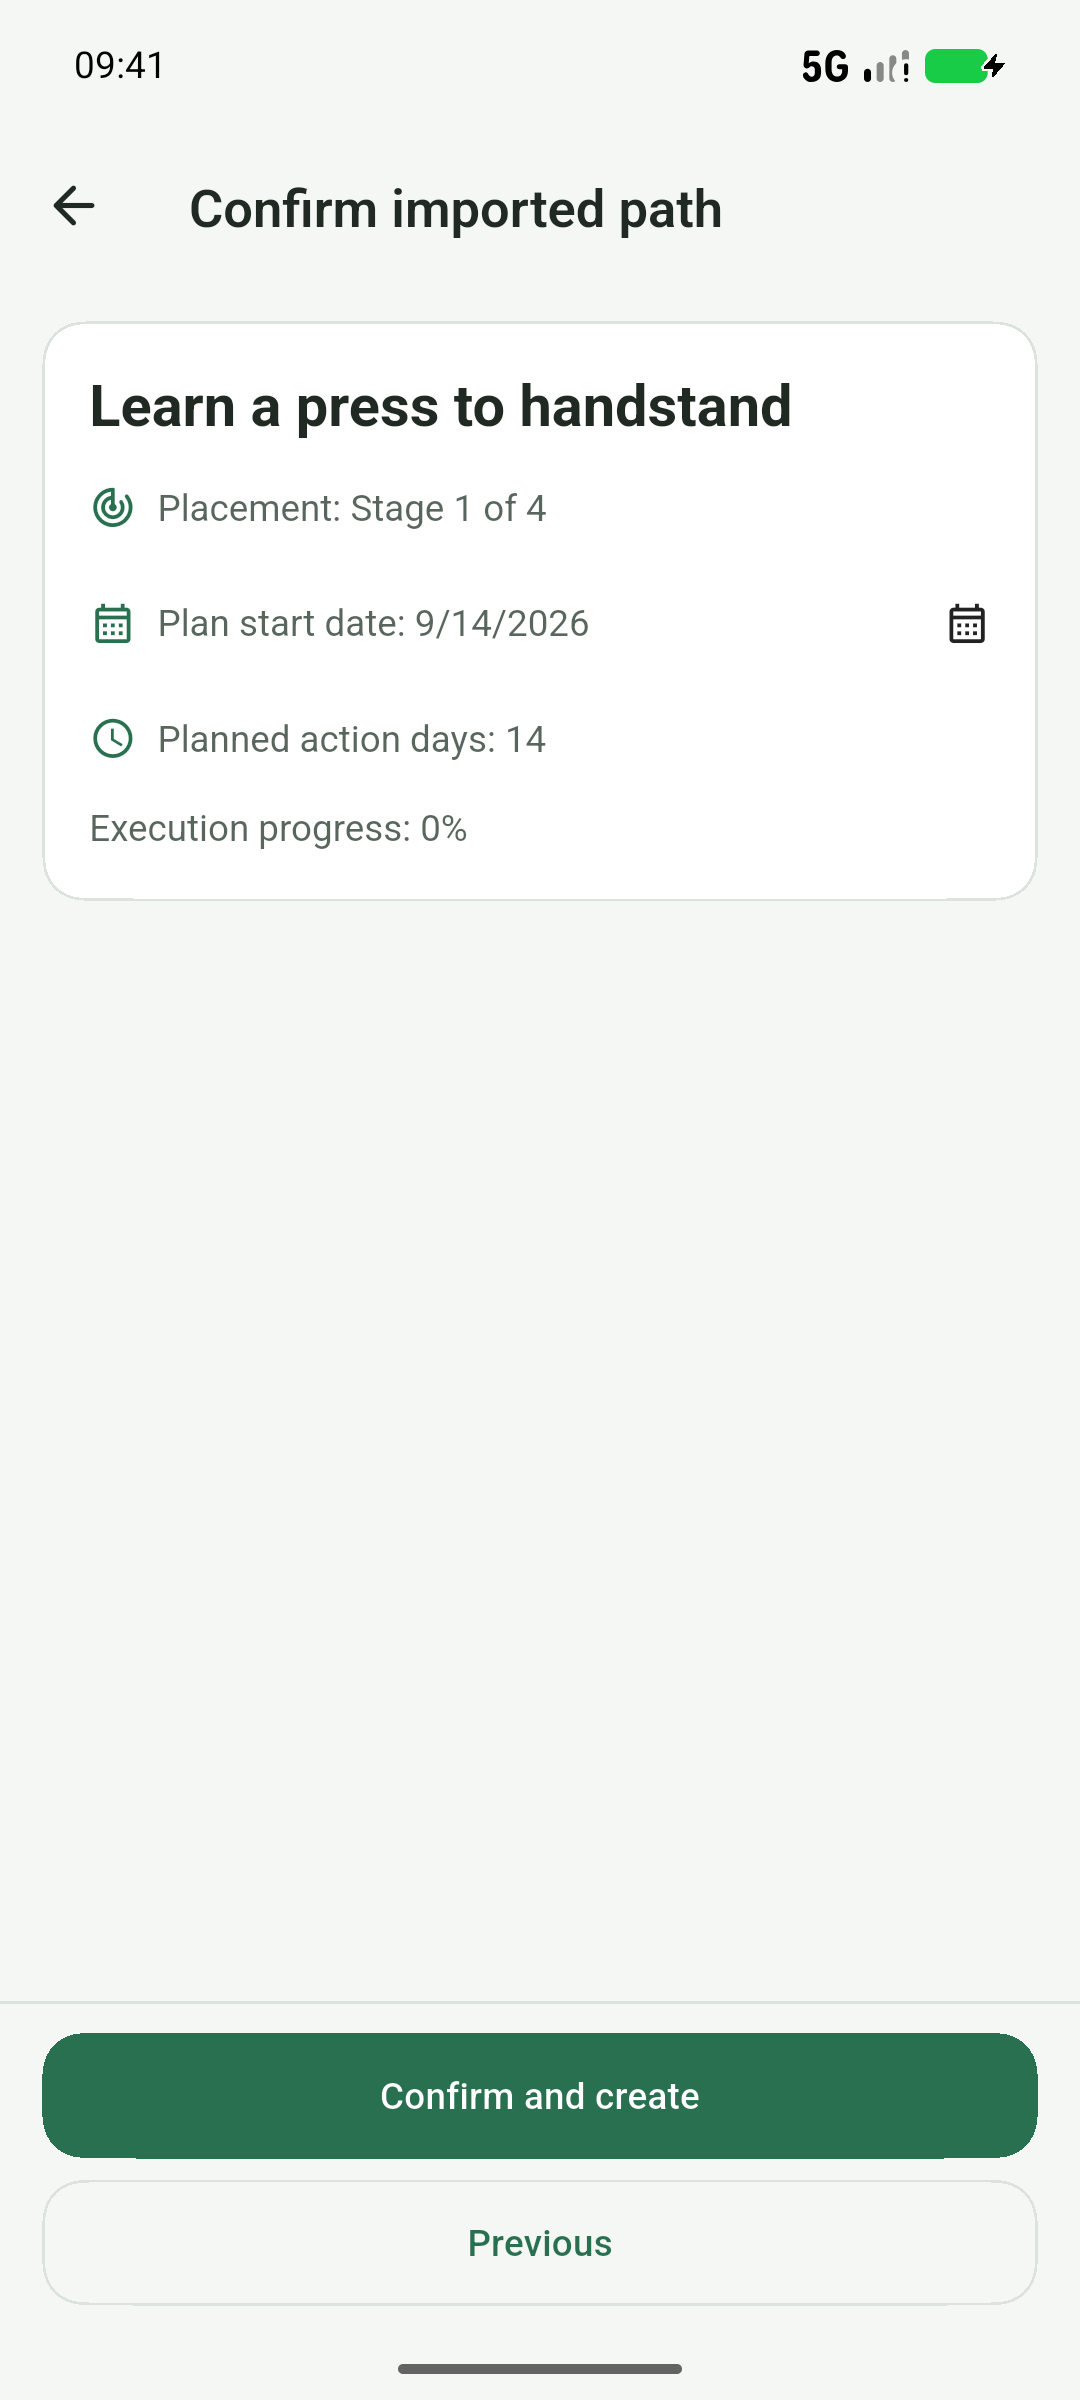
- Before sending, review the recipient service, model and authorized data. Check the generated stages, action days, tasks and subtasks, edit as needed, then confirm the start date and create.
- For an existing path, use Analysis or Adjust in details. Analysis produces a report; adjustments produce a proposal for your confirmation. AI does not complete work for you or apply path suggestions without confirmation.
What if setup or generation fails?
Check whether the service is enabled, the key and endpoint are correct, the account has API access and the model supports the needed capability. Catalog, text and planning tests are separate checks. A failed attempt is not a successful save: verify your draft before retrying. Provider usage fees are separate from the app purchase.
Endpoint checked on 2026-09-14. Models may change; consult the official DeepSeek API documentation.
06 · Reflect and revisit your journey
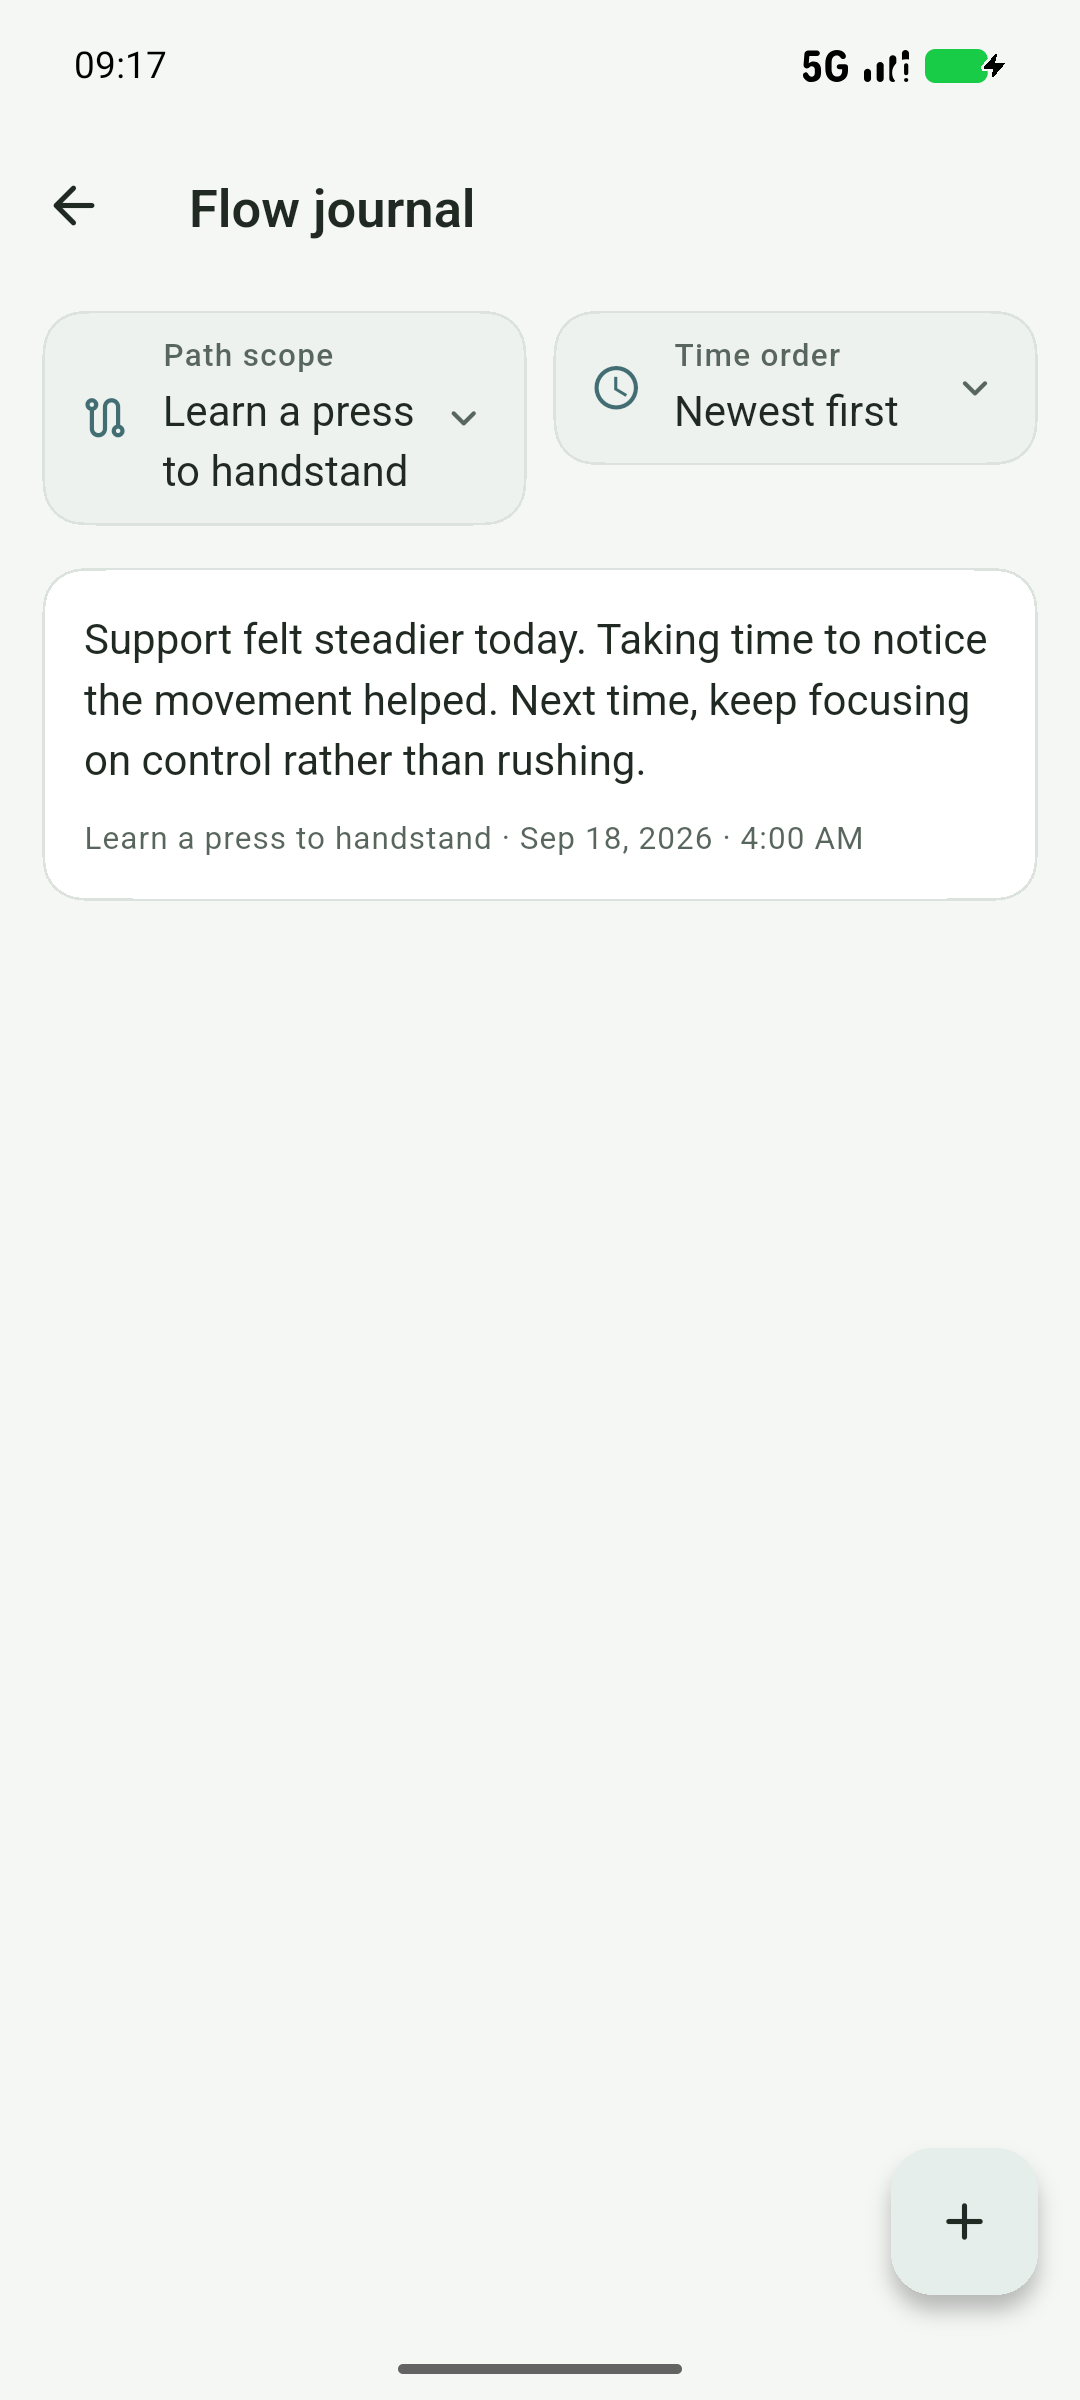
- After practice, open Reflection in path details. Note what you noticed, such as “Support felt steadier; keep focusing on control next time.” Each path allows up to 3 saved reflections per business day.
- When a stage assessment is available, answer based on what actually happened. Reaching the planned day count does not automatically mean you have mastered the skill; continue or adjust based on the assessment.
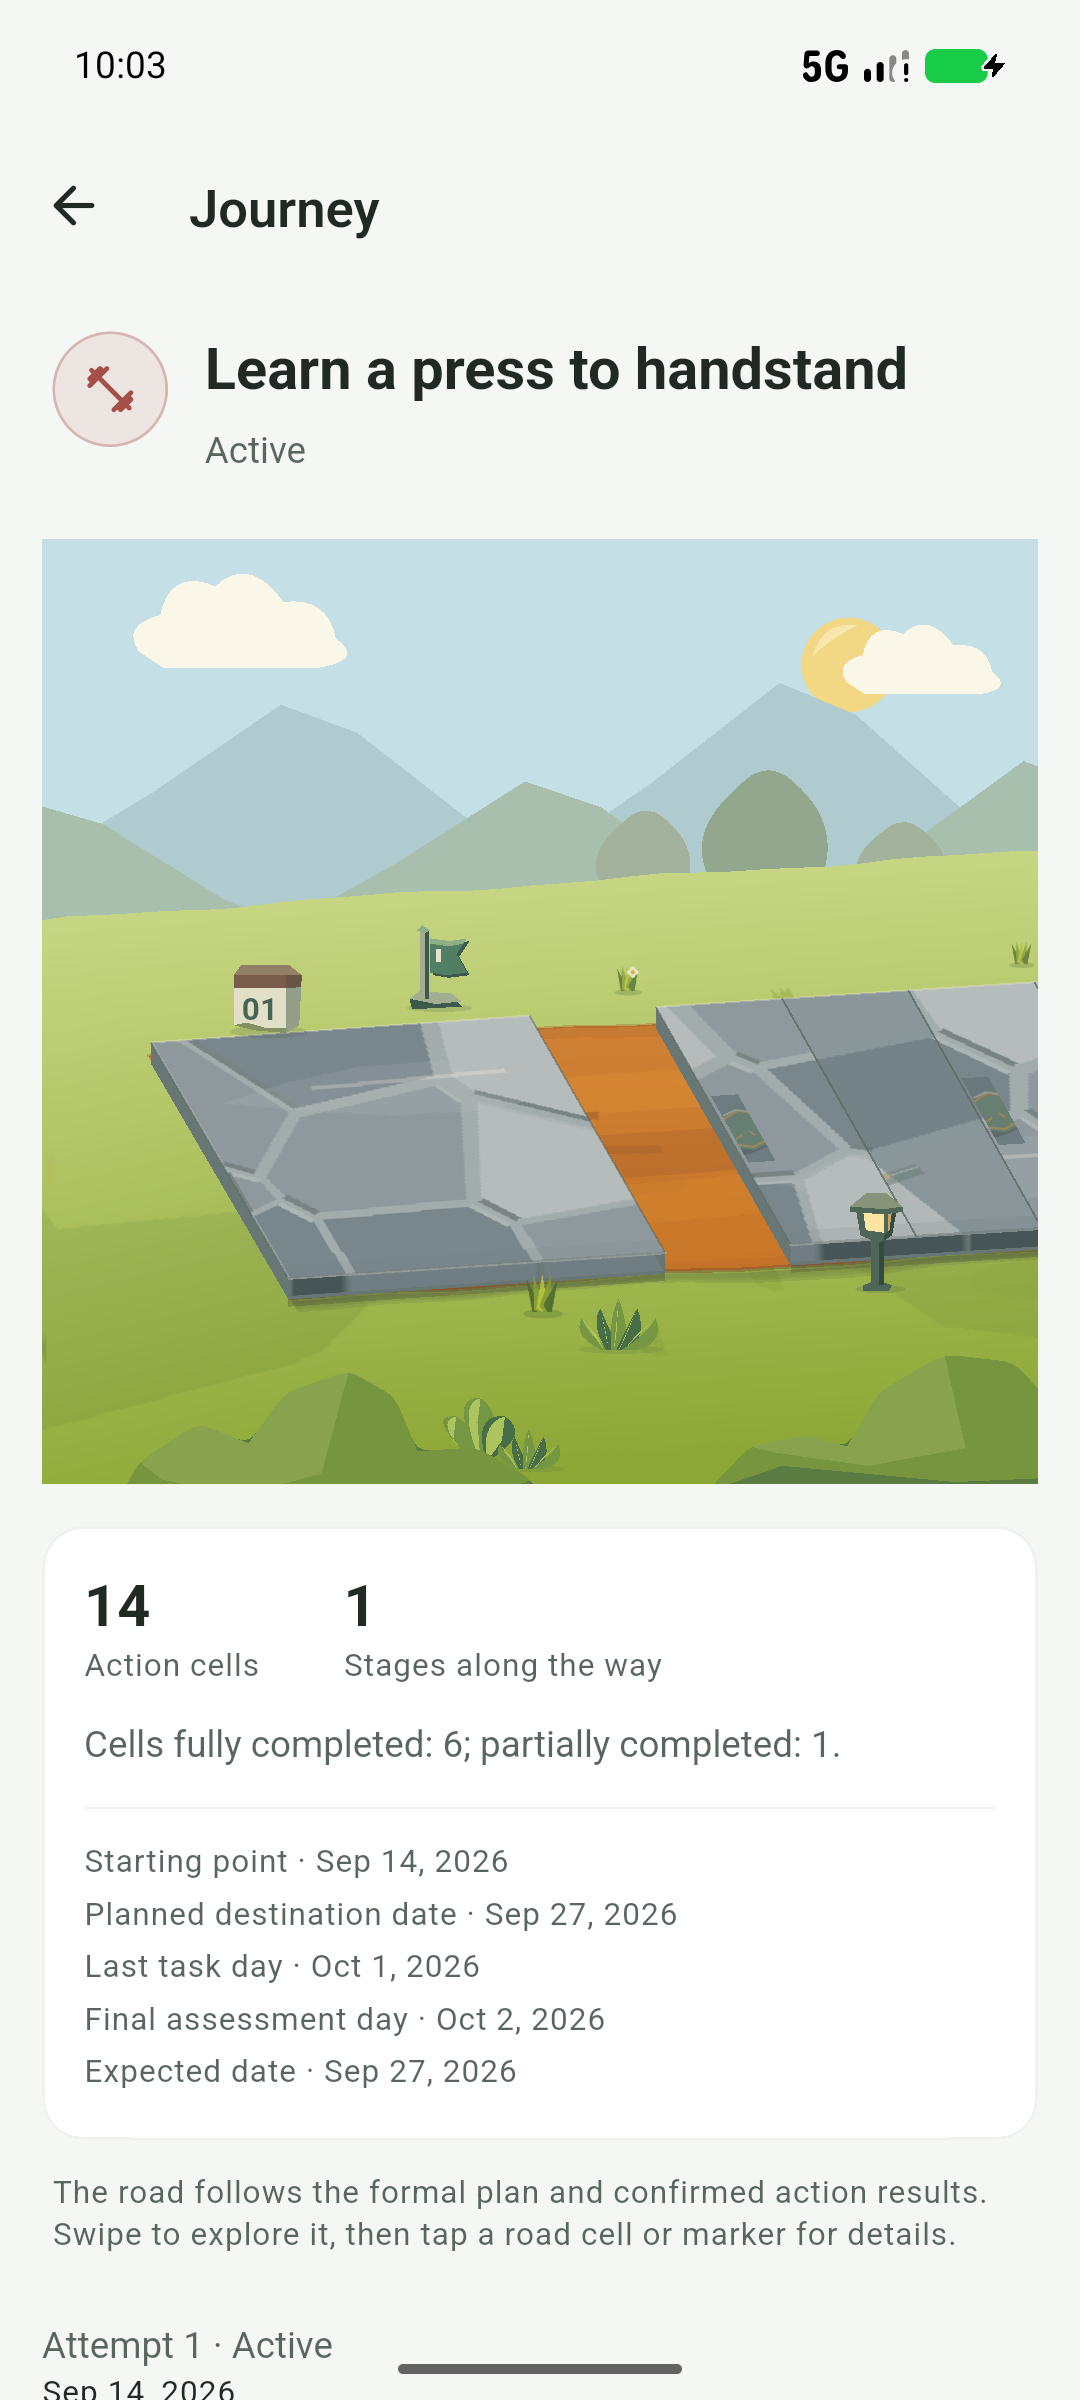
- Open Journey from the menu, choose your path and revisit action, missed work, make-up work and reflections. Ongoing roads are previews; ended roads preserve a view of the experience.
- The road is more than a completion counter. Select interactive road cells or reflection markers for details. Growth separately shows XP, levels and theme unlocks.
How do deletion, retaining a road and export differ?
The recycle bin holds removed paths. Read the permanent-deletion confirmation; retaining a road may require settlement first. Deleting is not the same as completing a path. Export shares a plan structure, not a full data backup. Cloud sync, WebDAV and full portable backups are not currently available.